Create an XML File from Excel
Written by
Reviewed by
This article will demonstrate how to create an XML File in Excel.
Excel workbooks are great flat file database that enable you to store great quantities of data. You may find, however, that you need to use this data somewhere else – perhaps in a web site or in some other application, and retyping hundreds of lines of data is time consuming and laborious. XML format is an easy to use and read type of format that is used extensively on such occasions and Excel provides you with excellent functionality in order to export your data in a valid XML format.
Create your Excel worksheet
The first step is to get your data in the correct format and saved with the correct name in order to link it to the XML Schema that you will need to create.
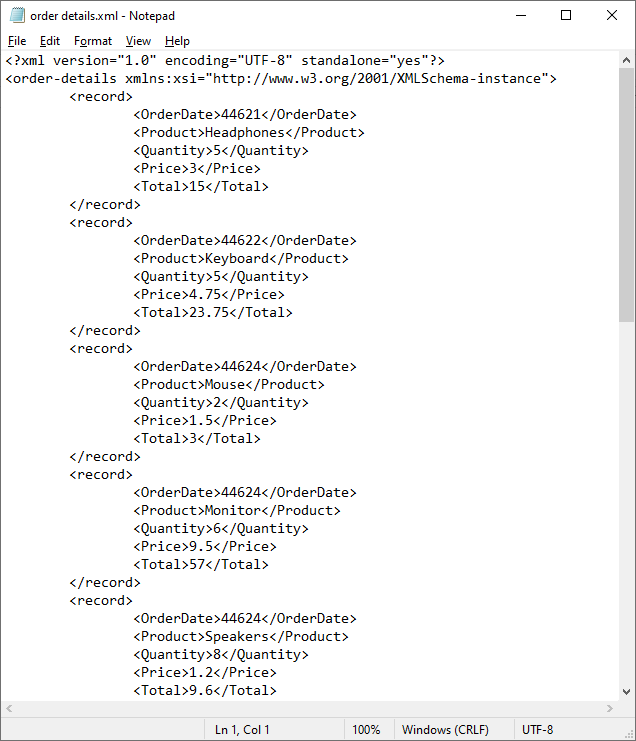
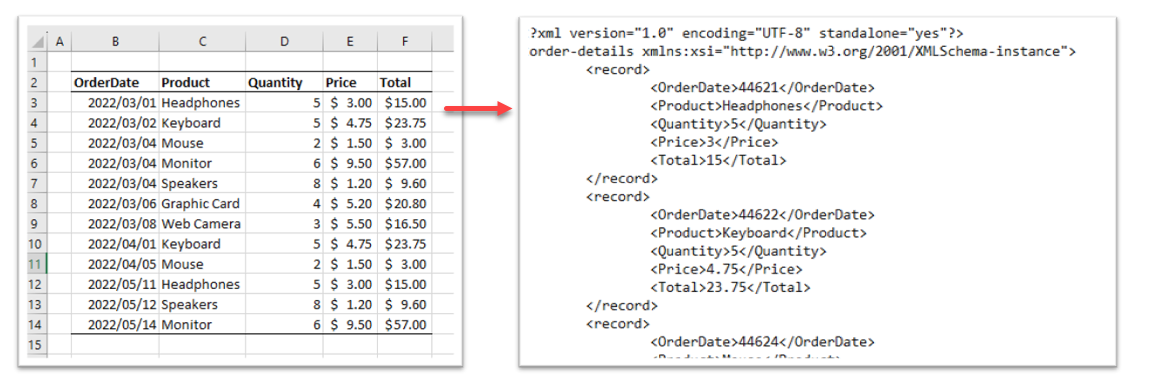
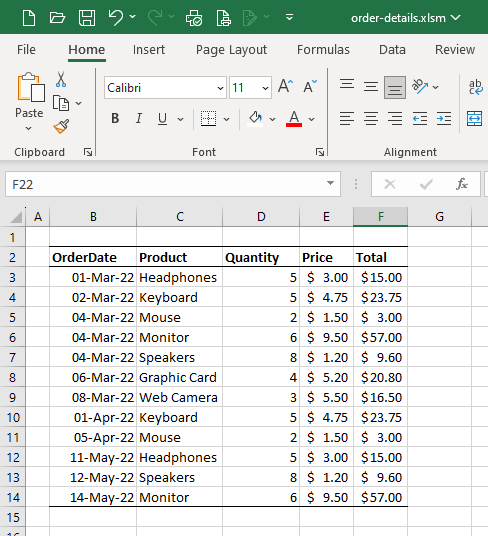
The data below is a series of orders for a company that sells various products. It is set out in columns, each with a heading indicating the data that is contained in each column. We have then saved the data calling it order-details.
Create your XML Schema
The next step is to create our XML Schema for our data. We can do this in Notepad or any other text editor. The schema has to be set out in a specific way in order for us to match it to our data.
- Create a new blank file in Notepad
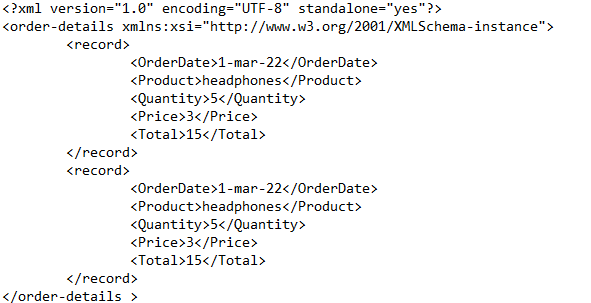
- You now need to create the standard XML elements for your file. A typical example is shown below:

- Type the following line at the top of the file
<?xml version="1.0" encoding="UTF-8" standalone="yes"?>
- Then in the next line, start by using the name of the Excel file that you have saved – for example: order-details. Your second line will look like this:
<order-details xmlns:xsi="http://www.w3.org/2001/XMLSchema-instance">
- Now you need to create the record entry in your XML file for first line of data in Excel. In our record entry, we need to replace the TAGNAME with the column header, and the word data with the information in the first line of data. The next few lines of our XML map will therefore look like this:
<record>
  <OrderDate>1-mar-22</OrderDate>
  <Product>headphones</Product>
  <Quantity>5<Quantity>
  <Price>3</Price>
  <Total>15</Total>
</record>
- Directly underneath that we create a second record. This record will contain the data from the second line of data in the Excel sheet. We only need to do 2 records of data for Excel to recognise the XML map and it will then map the other records of data for you in the XML file that is exported.
<record>
 <OrderDate>1-mar-22</OrderDate>
 <Product>headphones</Product>
 <Quantity>5<Quantity>
 <Price>3</Price>
 <Total>15</Total>
</record>
- We end off the XML schema file by closing the <order-details> tab
</order-details>
- The entire XML Schema file will look like the example below:
- Save the file with an XML extension such as data-map.xml.
Add your XML Map to your worksheet
At this stage, you will need the Developer tab visible in Excel. If you do not know how to show the developer tab on the ribbon, you can find out how to do that here.
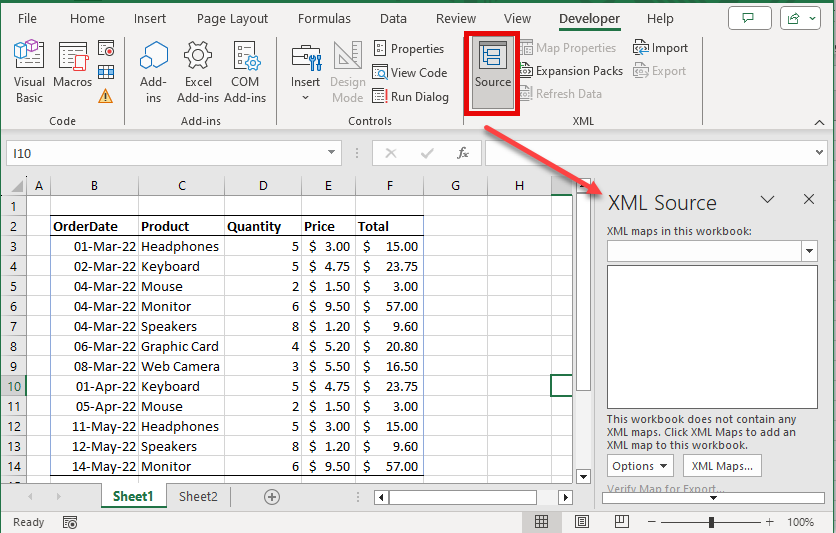
- In the Ribbon, select Developer > XML > Source. The XML Source Pane will appear in the right hand side of your screen.
- Then, click on the XML Maps button.

- Click on the Add button, and navigate to find your XML Schema file that you have just created.

- Click on the file and click Open. The Schema will be added to the XML Maps dialog box.
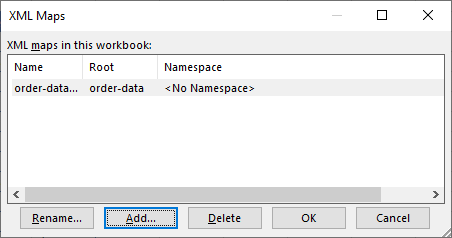
- Click OK. The XML Map will then appear in the XML Source Pane.
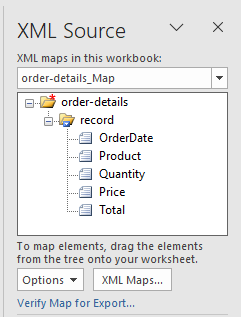
- Drag the first element in the record (OrderData) and drop it onto the Order date column in your data. You may get a warning message appearing that the formatting of your data does not match the formating in the xml map.
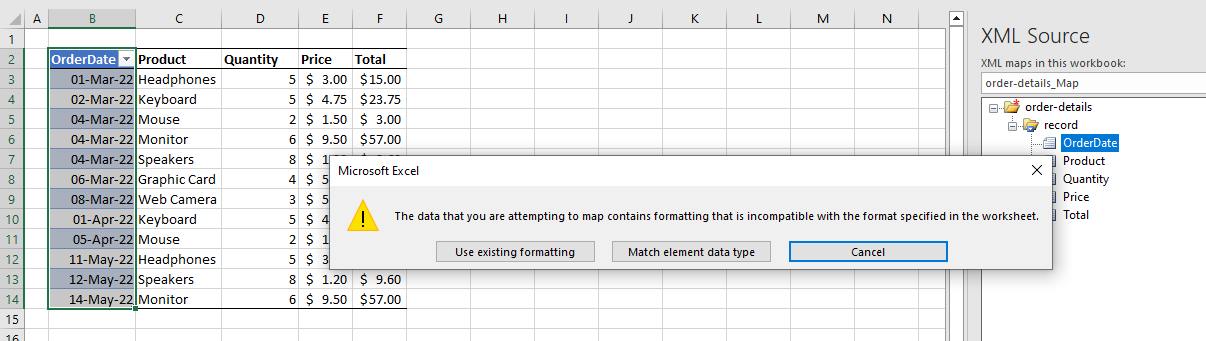
- If you wish to keep the formatting as shown in your Excel worksheet, then select the first option “Use existing formatting”. Otherwise click “Match element data type” If you select this second option, then the data as shown on the screen will be reformatted. Either of these options will work. When you click on one of the buttons, the column should turn blue as the data is recognised as matching the record entry.
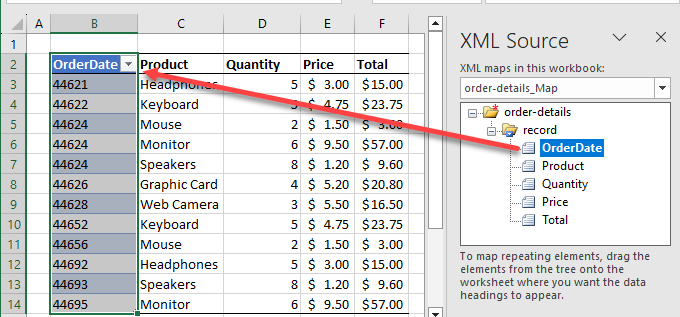
- Continue the process with the remaining columns. The entire table should then be formatted with blue columns.
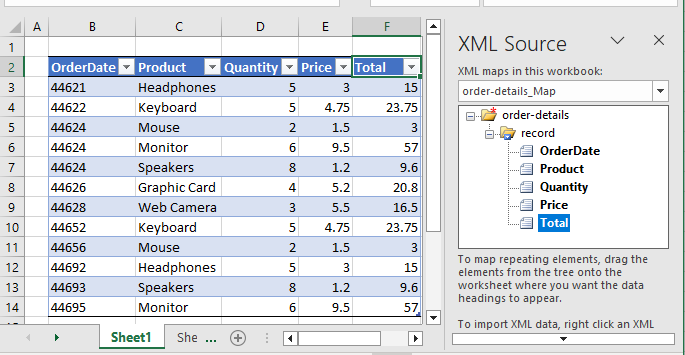
- Your data is now ready to be Exported as an XML file.
Export your XML file
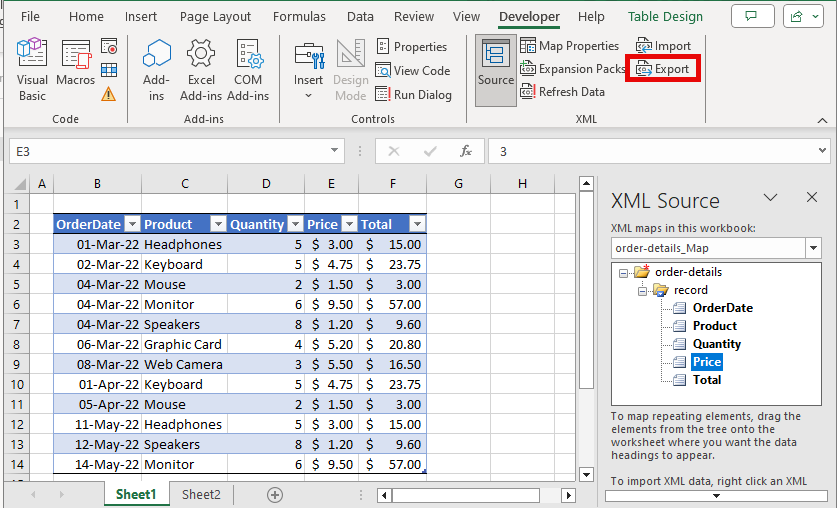
- In the Ribbon and select Developer > XML > Export.
- Navigate to the folder where you wish to store your file and then (1) type in the name of your file and (2) click Export.
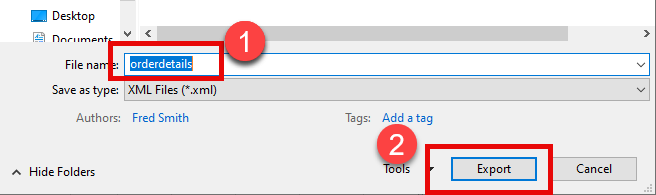
- Your file will be created. You can then navigate to the folder that you selected and open your file to view the contents.