Split a Text Cell to Two or More Rows in Excel & Google Sheets
Written by
Reviewed by
In this tutorial, you will learn how to split a text cell into two or more rows in Excel and Google Sheets.
Split a Text Cell Into Rows
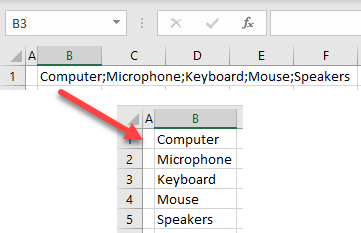
If you have text in a single cell delimited with some character (space, tab, semicolon, etc.), it can be split into multiple rows using Text to Columns and Transpose Data in Excel. Say you have the semicolon-delimited product list in the picture below and want to split the list into rows.
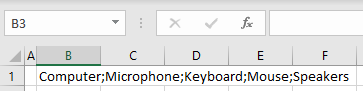
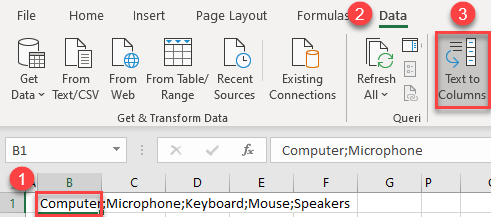
1. First, separate values from cell B1 into columns based on a delimiter. Select a text cell (B1) and in the Ribbon, go to Data > Text to Columns.
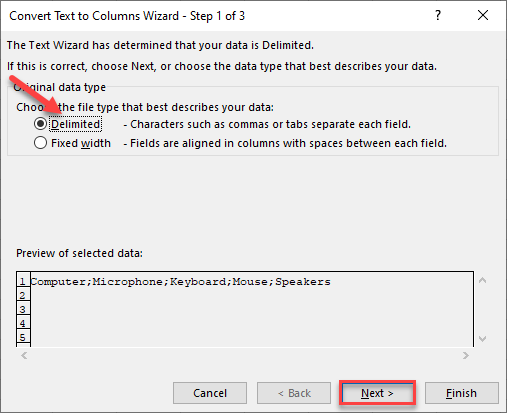
2. In Step 1 of the Text to Columns Wizard, leave the default file type (Delimited), and click Next.
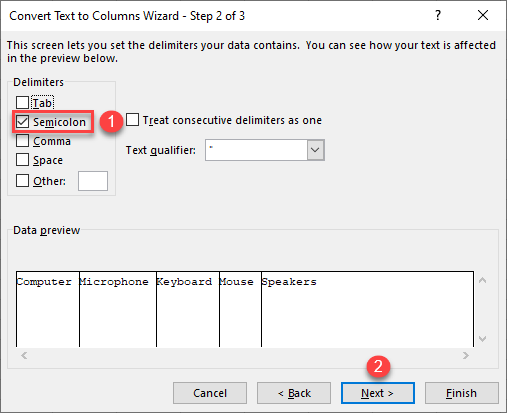
3. In Step 2, check Semicolon under Delimiters, and click Next. In the Data preview, you can see how this data will be delimited.
Other possible delimiters are tab, comma, space, and user-defined delimiter.
4. In the final step, leave the default data format (General) and click Finish.
Here you could also choose other types of data, like text or date. You could also select columns individually in the Data preview and change their data types.
For the Destination, leave the initial cell to split data into columns starting from cell B1.
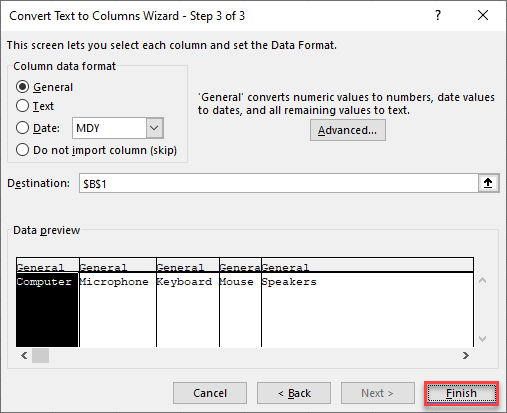
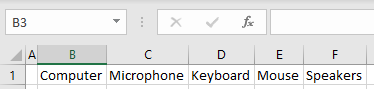
As a result of this part, text from cell B1 is split into Columns B–F, at each semicolon.
5. Now use the Transpose Data feature to transpose values from Row 1 to Column B. Start from cell B1 (so the current B1 value will stay there), and transpose cells C1:F1.
To do this, select and right-click the cells to transpose (C1:F1), then click Copy (or use the keyboard shortcut CTRL + C).

6. Select and right-click the cell where you want to start the transposed data (B2) and choose Transpose under Paste Options.

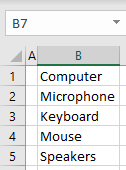
Finally, values from cell B1 are now transposed in Column B, cells B1:B6. The original list is split into rows.
Split Multiple Text Cells Into Rows
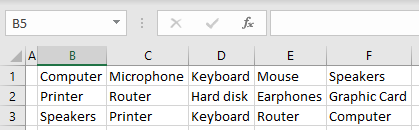
If you have data in multiple cells, like in the picture below, you can also split the text into rows in much the same way as the single-cell case above.
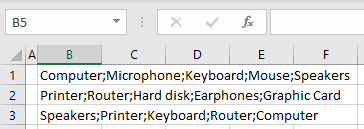
Follow these steps to split the text in B1:B3 to columns:
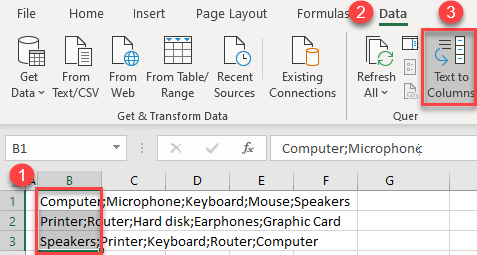
1. First, separate values from cell B1:B3 to columns based on a delimiter. Select the text cells you want to split (B1:B3) and in the Ribbon, go to Data > Text to Columns.
2. In Step 1 of Text to Columns Wizard, leave the default file type (Delimited), and click Next.

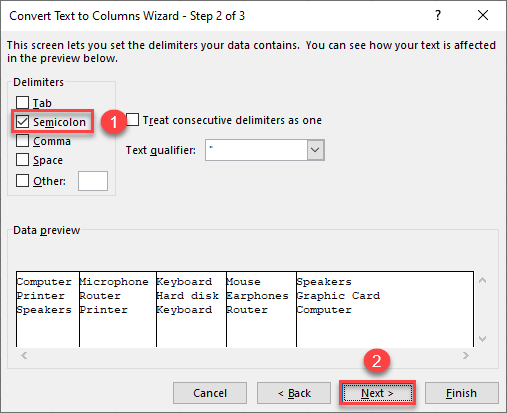
3. In Step 2, check Semicolon under Delimiters, and click Next.
4. In the final step, leave the default data format (General) and click Finish.
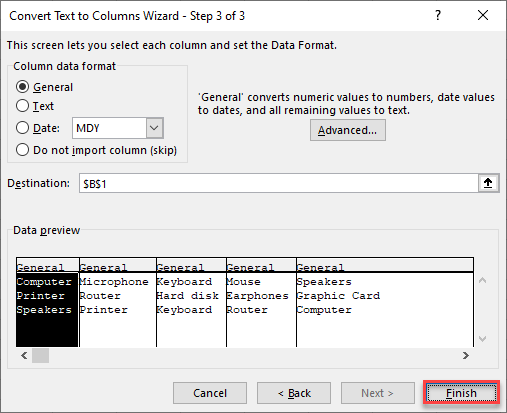
As a result of this part, text from cells B1:B3 is split at each semicolon into Columns B–F.
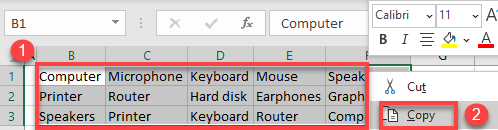
5. Now transpose values from Rows 1–3 to Columns B–D. Since the data is in multiple rows, you must transpose to a new range (and later delete the initial data range).
Select and right-click cells to transpose (B1:F3), and click Copy (or use the keyboard shortcut CTRL + C).
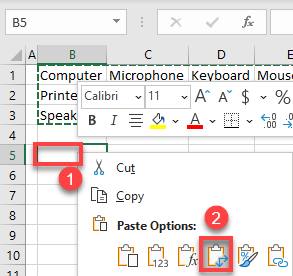
6. Select and right-click the starting cell for the transposed data (B5) and choose Transpose under Paste Options.
Finally, values from cells B1:B3 are now transposed in Columns B–D, cells B5:D9. You can delete the initial data from cells B1:F3.

NOTE: You can also use VBA code to split a text into columns.
Split a Text Cell Into Rows in Google Sheets
You can also use Split Text to Columns and Transpose features to split a text cell into multiple rows in Google Sheets.
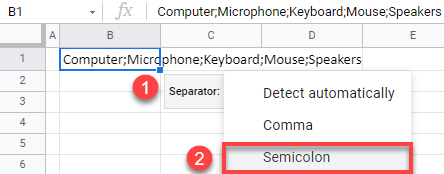
1. First, right-click a cell containing text (B1) and in the Menu, go to Data > Split text to columns.
2. Click the Separator button that appears, and choose Semicolon.
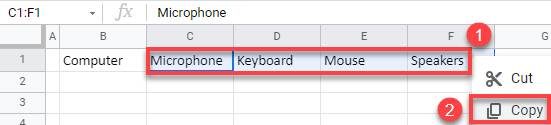
As a result of this step, text from B1 is now split into columns B:F, based on a semicolon delimiter.

3. Now you can use the Transpose Data feature to transpose values from Row 1 to Column B. Start from cell B1 (so the B1 value will stay there), and transpose cells C1:F1.
To do this, select and right-click the cells to transpose (C1:F1), and click Copy (or use the keyboard shortcut CTRL + C).
4. Select and right-click a cell from which you want to transpose data (B2), choose Paste special, then Paste transposed.
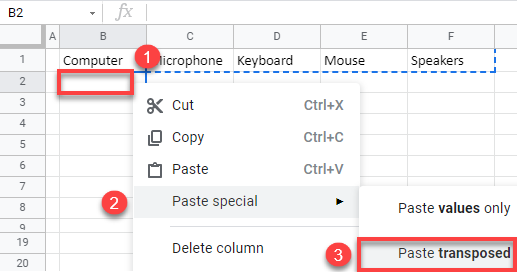
Finally, values from cell B1 are now transposed in Column B, cells B1:B6. The original list has been split into rows.
Split Multiple Text Cells Into Rows in Google Sheets
Now, you can split multiple text cells into multiple rows using the same example.
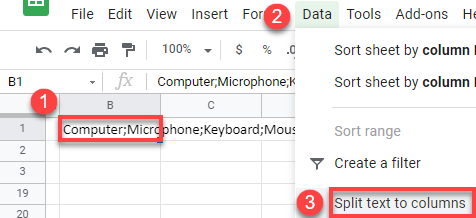
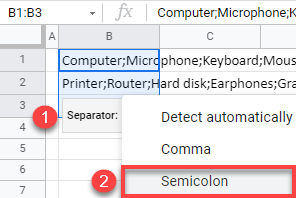
1. Select and right-click cells containing text (B1:B3) and in the Menu, go to Data > Split text to columns.
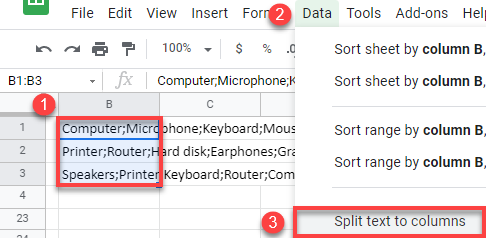
2. Click the Separator button that appears, and choose Semicolon.
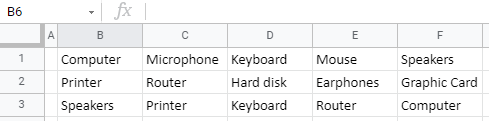
As a result of this step, text from cells B1:B3 are split at each semicolon into columns B–F.
3. Now transpose the data from Rows 1–3 to Columns B–D. Since the data is in multiple rows, you must transpose to a new range (and later delete the initial data range).
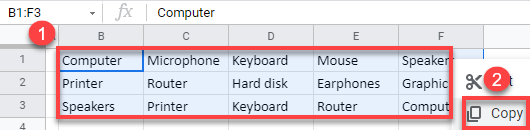
Select and right-click cells to transpose (B1:F3), and click Copy (or use the keyboard shortcut CTRL + C).
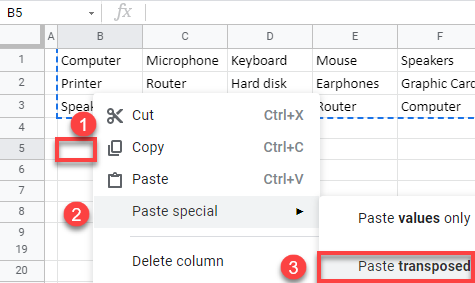
4. Select and right-click the starting cell for the transposed data (B5), choose Paste special, and click Paste transposed.
Finally, values from cells B1:B3 are now transposed in Columns B–D, cells B5:D9. You can delete the initial data from cells B1:F3.

