Loop Macros
The Loop Macro Builder is the most flexible and powerful automation tool in AutoMacro.
Loop Macros repeat action(s) on all items of a certain type, or all items of a certain type that meet certain rules.

Use Cases:
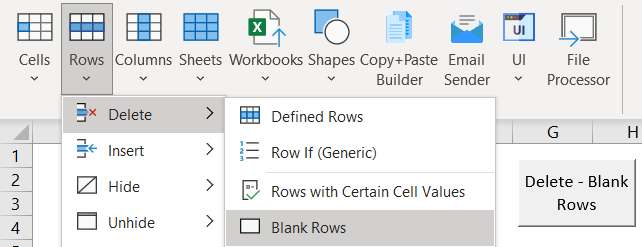
- Delete all blank rows
- Highlight rows with error values
- Hide rows with certain values.
- Autofit all Columns
- Email specified worksheets as PDFs
- Email Workbooks
- Hide & protect certain worksheets when the workbook is opened.
- Go-to cell A1 when a sheet is activated.
- Hide certain rows when a sheet is activated.
- Delete all shapes in the workbook.
Like all AutoMacro’s Macros, Loop Macros can be used in the following ways:
- Run one-time (do not add Macro to workbook)
- Add as a Macro button to your workbook.
- Assign Macro to a shape (Runs when clicked)
- Create an event “trigger” to run Macro when certain events happen (exs. Activate worksheet, open workbook, change a certain cell value).
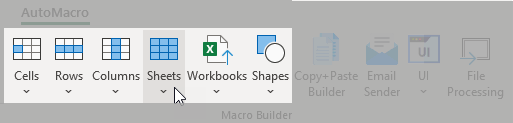
AutoMacro allows you to create Loop Macros for:
- Cells
- Rows
- Columns
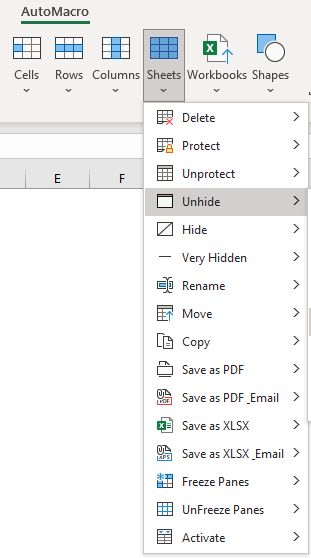
- Sheets
- Workbooks
- Shapes
- Charts*
- PivotTables*
- Tables*
- Named Ranges*
- External Links*
*These options are only available from the Loop Builder Menu (see below), not from the Ribbon Menu in Excel.
Loop Builder – How-to
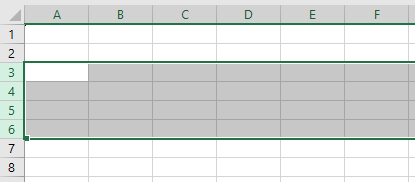
Step 1. Select Range (Required for Cells, Rows, and Columns).
To perform actions on Cells, Rows, or Columns, first define the range to perform actions on.
Select the range just like you would select any range in Excel.
Step 2. Select Item
Select which item to perform action(s) on.
Step 3. Select Action
Select action to perform on item.
Step 4. Select Rule
Select rule to determine which of the items to perform actions on.
Step 5. Finalize Macro
Some Actions and Rules require additional input. If your macro requires additional input, you will see the screen below. If not, you will automatically skip to the next step.
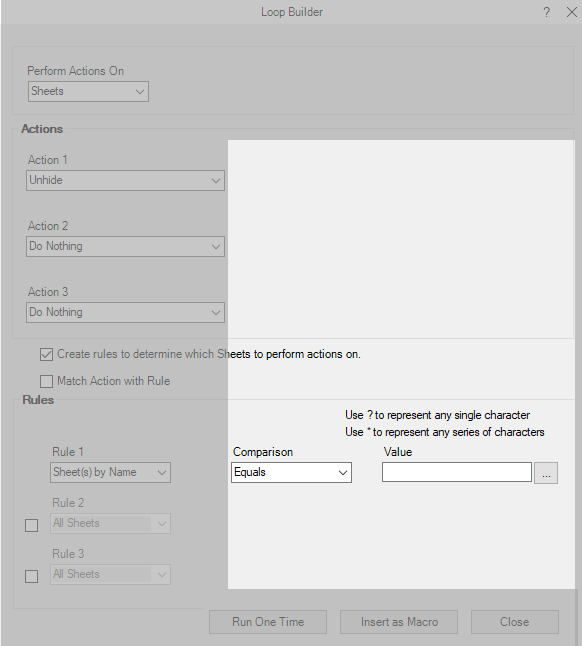
The Required Inputs will appear in the highlighted area. We will discuss this inputs in detail later in the tutorial.
Then click Insert as Macro to proceed to the last step.

Step 5 (Optional). Customize Macro
The Loop Builder allows you to customize the macro with smarter logic, additional actions and rules, and even matching actions and rules together.
If your selected options don’t require additional inputs, you will skip this menu and go straight to the Insert Macro menu.
Within the Insert Macro menu, you can click Edit Macro to go to the Loop Builder menu.
Perform Actions On
Perform Actions On – Allows you to change which items to loop through. Here you can select several options not available from the Ribbon menu.
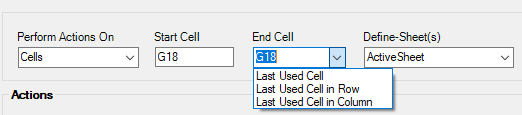
Start Cell & End Cell – When working with Cells, Rows, and Columns, you must define the start and end cell, row, or column to loop through. By default AutoMacro will use the currently selected range to populate these values. But you can customize them here, including by creating flexible ranges using the last used cell, row, or column:
Which Sheet(s)? – Select which sheet to perform actions on. By default, the “ActiveSheet” (the currently activesheet when the macro runs) is selected. You can also choose “All Sheets in Workbook”.
Actions
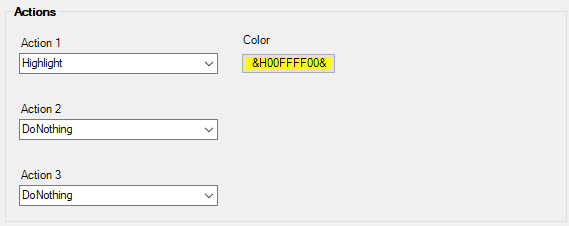
You can select up to 3 actions to perform. Some actions will require inputs.
Create rules…

Unchecking this option will disable the rules, so actions will be performed on all items.
Match Action with Rule

This option will match each action with the rule so that:
- Action 1 is performed only on items that meet Rule 1
- Action 2 is performed only on items that meet Rule 2
- Action 3 is performed only on items that meet Rule 3
If unchecked (default), all actions are performed on all items that match all rules.
Rules
You can select up to 3 rules to apply. Many rules require inputs. We will discuss the inputs below.
Generated Code
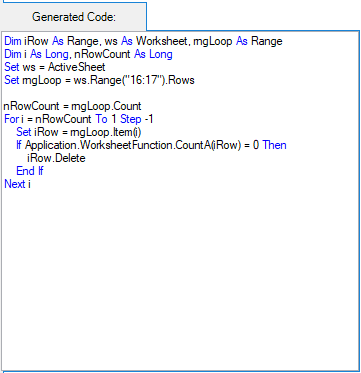
The Generated Code section shows you the VBA code for your selected options. This is a great tool if you are interested in learning VBA. If not, you can simply ignore this.
Run One Time or Insert as Macro

If you click Run One Time, the macro will run immediately and will not be saved to your workbook.
If you click Insert as Macro, you’ll be sent to Insert Macro menu (next step).
Step 6. Insert Macro
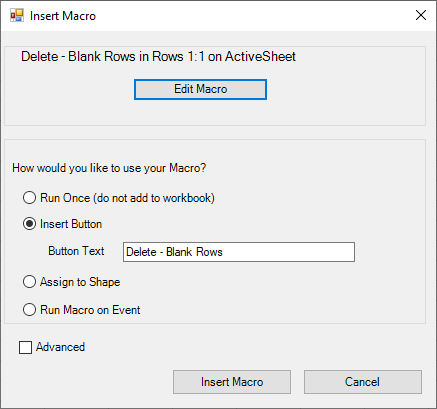
Last, choose how to use your Macro.
Rules – More Information
A few additional remarks are required relating to Rules.
Most Rules are obvious, but a few require more explanation.
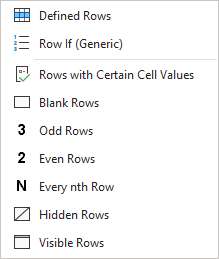
At the top of Cells, Rows, and Columns you’ll see two options:
Defined Rows (Columns, or Cells) – When this option is selected no rules are applied and the action is applied on all rows in the range.
Row If (Generic) – This option won’t define any rule, but instead will open the Loop Builder Menu for you to create your own rules.

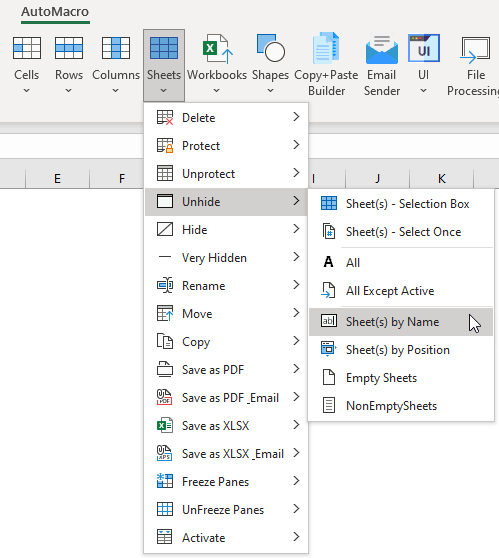
Sheet(s) – Selection Box – This opens up the SelectBox Menu. With a SelectBox, the end-user determines which sheets actions are applied to.
Sheet(s) – Select Once – You will be prompted to select which sheets to apply action(s) to.
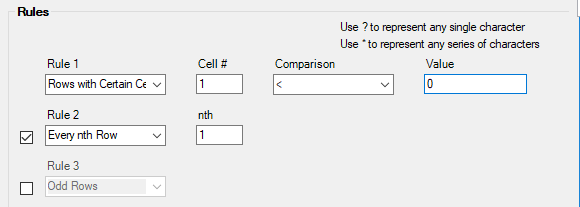
Rules Continued
When creating rules from the Loops menu, you’ll be presented with some inputs. Most are self-explanatory, but we will walk through an example.
In this example, the rule is Rows with Certain Cell Values.
First, enter Cell #. 1 corresponds to the first column in the row. 2 to the 2nd, and so on.
Next, choose a Comparison from the drop down list:
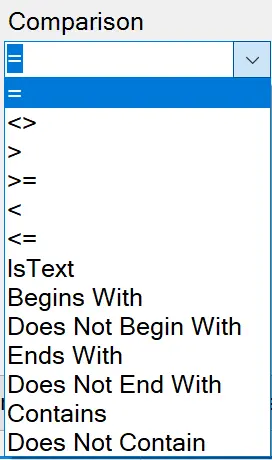
And then enter a value.
When entering a value, you can use wildcard characters.
Getting Started
SelectBox Builder
Start Automating Excel