How to Link a Text Box to a Cell in Excel
Written by
Reviewed by
Last updated on April 23, 2023
This tutorial demonstrates how to link a text box to a cell in Excel.

Link a Text Box in Excel
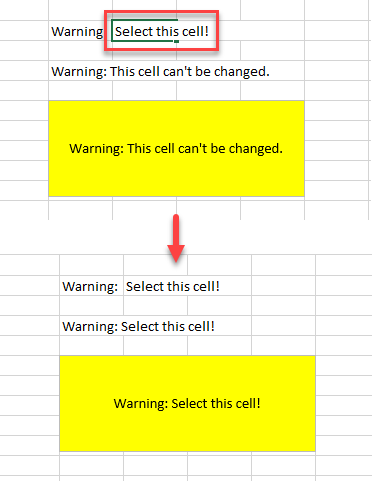
In Excel, you can link a text box to a cell to show the content of that cell in the text box, providing dynamically changing text on your sheet. When the linked cell changes, the text box updates automatically. Start by inserting a new text box.
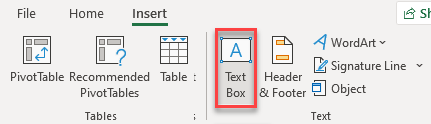
- In the Ribbon, go to Insert > Text > Text Box.
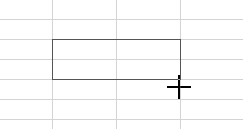
- The cursor changes to a black cross. Now you can draw a text box in the size you want.
- To link a text box to a cell, first select the text box. Then in the formula bar, type the equal (=) symbol and click on the cell you want to link. Press ENTER.
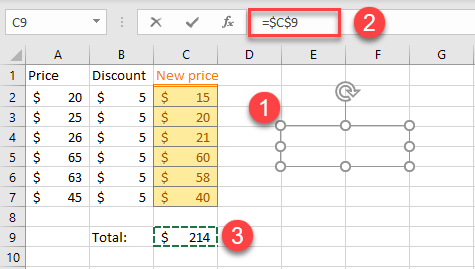
As a result, the content of the selected cell is displayed in the text box.

Use Text Box to Link a Sentence
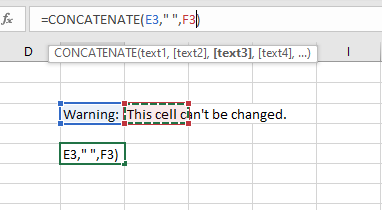
The text box can also link text from multiple cells into a sentence. For example, say you want to join the text contents of cells E3 and F3 into one string and link it to your text box.
- Type the formula into cell E5:
=CONCATENATE(E3," ",F3)The CONCATENATE Function joins the text into one sentence in cell E5.
- If you then link this concatenated cell to a text box as shown above (with “=$E$5” instead of “=$C$9”), it displays the contents of the first two cells (E3 and F3) as a single sentence.
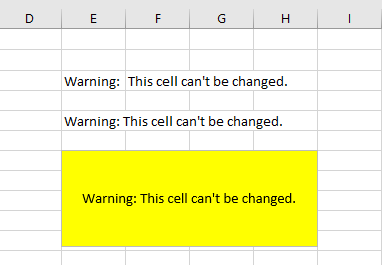
- When you change the values of cells E3 or F3, the text box updates automatically.