How to Save File as Read-Only in Excel & Google Sheets
Written by
Reviewed by
This tutorial demonstrates how to save a file as read-only in Excel and Google Sheets.
In this Article
Save as Read-Only
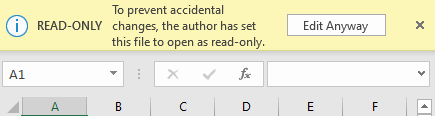
An Excel file can be saved as read-only to prevent users from inadvertently changing the content. When a user opens a read-only file, they need to enable editing.
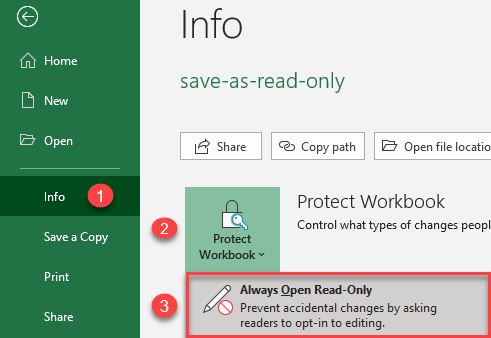
- To enable read-only mode, in the Ribbon, go to File > Info.
- Click Protect Workbook.
- Then click Always Open Read-Only.
As a result, the user is asked to enable editing every time the file is opened.
When you click Edit Anyway, you can work in the file.
Protect With a Password
You can also password-protect an Excel file to make it read-only. In this case, a user can enter a password to edit a file or open it in read-only mode. There is no Edit Anyway option.
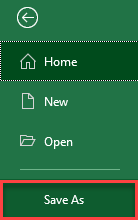
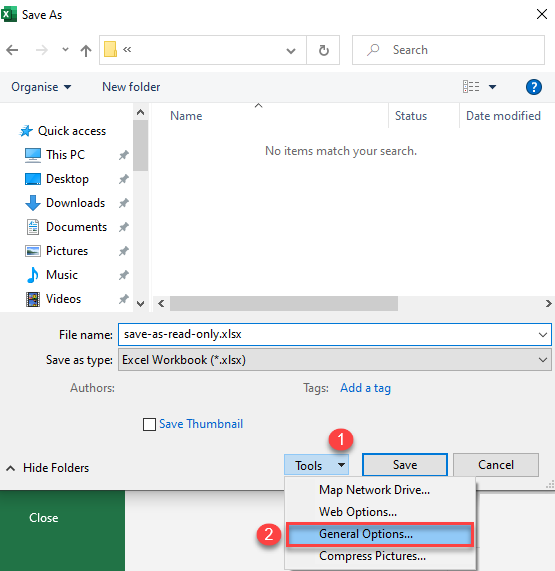
- In the Ribbon, go to the File tab, and choose Save As.
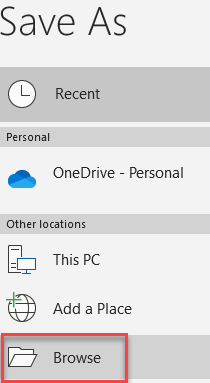
- Choose Browse.
- In the Save As window, go to Tools > General Options.
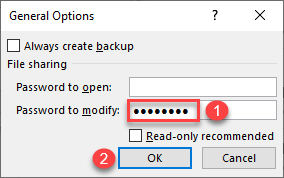
- In the General Options window, type in a Password to modify, and then click OK.
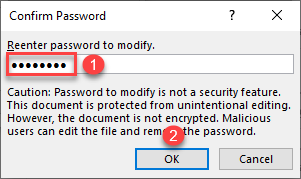
- Reenter the password, and then click OK.
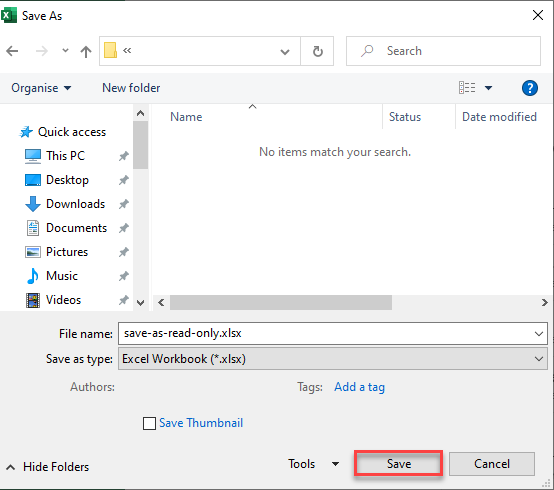
- In the Save As window, click Save.
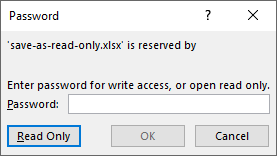
Now when you open the file, you get a prompt to enter a password to modify the file. If a user doesn’t have a password, they can open the file as read-only.
Set Permissions to Protect a Google Sheet
In Google Sheets, there isn’t a read-only setting like there is in Excel. To protect a range or a whole sheet from changes, you have to set permissions.
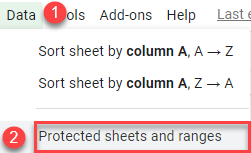
- In the Menu, go to Data > Protected sheets and ranges.
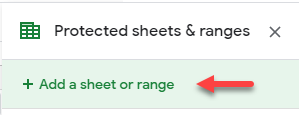
- The Protected sheets and ranges section appears on the right side. Click Add a sheet or range.
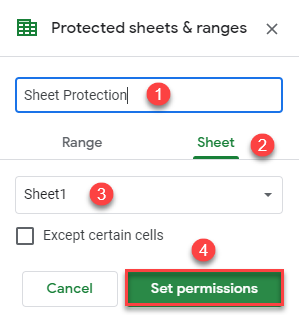
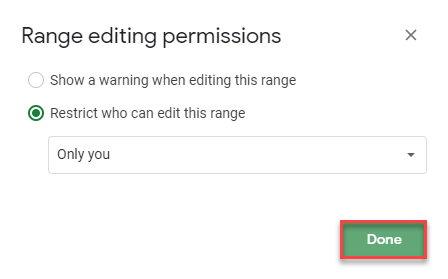
- Type in a description of the protection. Then under Sheet, choose a sheet to protect and click Set permissions.
- You have three options for editing permissions:
- Show a warning when editing
- Only the owner of the file can edit
- Specify users who can edit the file
For this example, leave the default option (so that only the owner can edit the file) and click Done.
As a result, if anyone other than the owner tries to edit the sheet, Google Sheets rejects the changes.
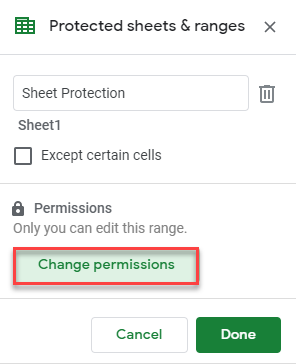
Change Permissions – Google Sheets
There’s also the option to change permissions so that Google Sheets displays a warning when you’re editing the sheet.
- In the Protect sheets & ranges window, click Change permissions.
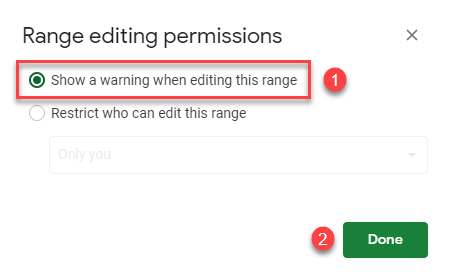
- Choose Show a warning when editing this range, and then click Done.
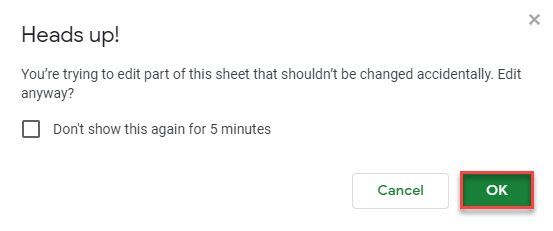
- Now if you try to change any cell in the sheet, you get the warning shown in the picture below. Click OK in order to allow the changes; Click Cancel if the edits are unnecessary.
Specify Users
Another option is to specify users (by email address) who can edit the file.
- In the Range editing permissions window (see Step 2 in the previous section), choose Restrict who can edit this range.
- Choose Custom from the drop-down list.
- In the Add editors box, type in the names or email addresses of users.
- Then click Done.
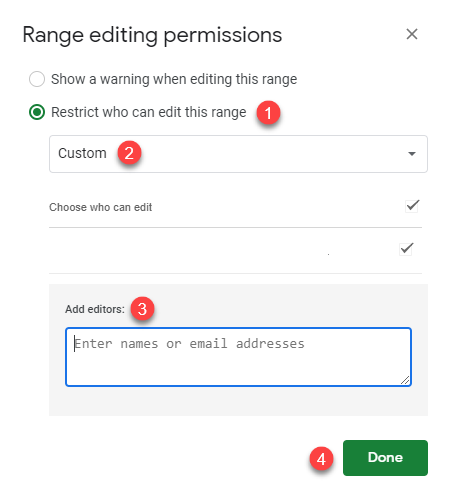
As a result, only those users specified in Step 4 have access to edit the Google Sheets file.
Tip: Also see how to track changes and share files.
