Define Print Titles (Rows) on Every Page in Excel & Google Sheets
Written by
Reviewed by
This tutorial demonstrates how to define print titles – rows and/or columns printed on every page – in Excel and Google Sheets.
In Excel, you can use Page Setup to print the top row or the leftmost column on every page. We’ll explain in detail how to set the top row to repeat, and the procedure is the same for setting the column. You can set as many rows or columns as you need.
Define Print Titles
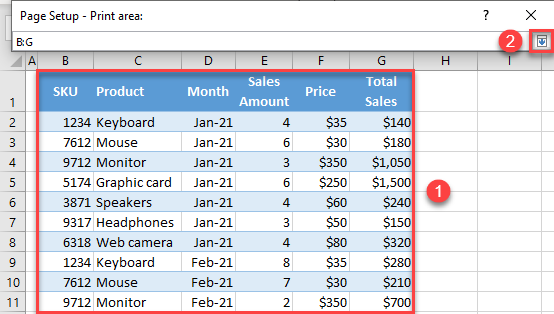
There is often a need to print a title row on every page. For example, when you have a data table printed on multiple pages, you’ll usually need to print a table heading row on each page. Say you have the following sales data table.
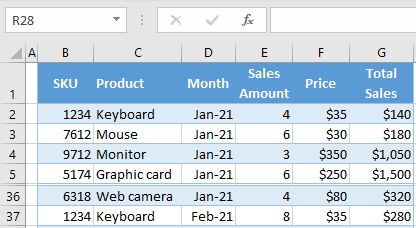
This table has 100 rows of data, so you need multiple pages for printing. Say you want to repeat Row 1 (the table headings, sometimes called “field names”) at the top of every page.
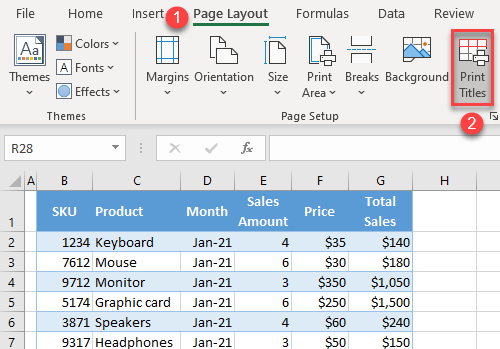
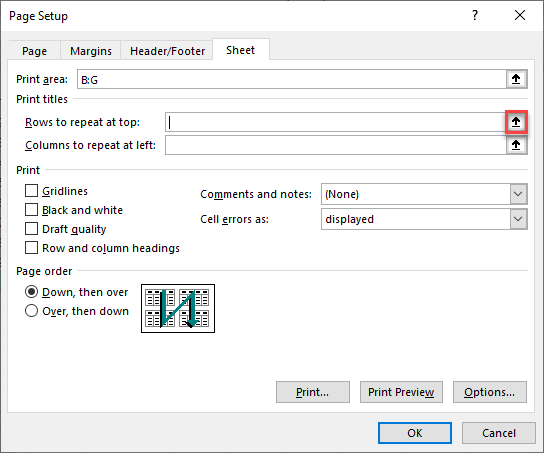
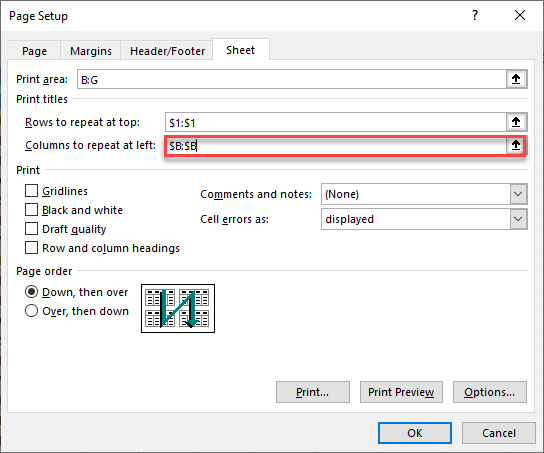
- In the Ribbon, go to the Page Layout tab, and in the Page Setup group, click on Print Titles.
- In the Page Setup window, click on the arrow next to the Print area box.
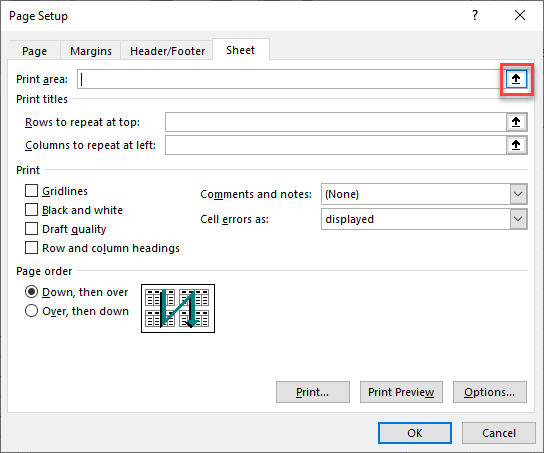
- Now select the print area (in this case, Columns B:G) and press ENTER or click the arrow on the right side of the box.
- Next, set which rows you want to repeat at the top. Click on the arrow next to the Rows to repeat at top box.
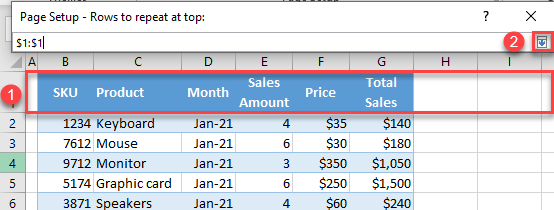
- Select Row 1 to repeat this row on each page, and press enter or click on the arrow on the right side of the box.
- Now you can see how the pages would look when printed. In the Page Setup dialog box, click Print Preview.
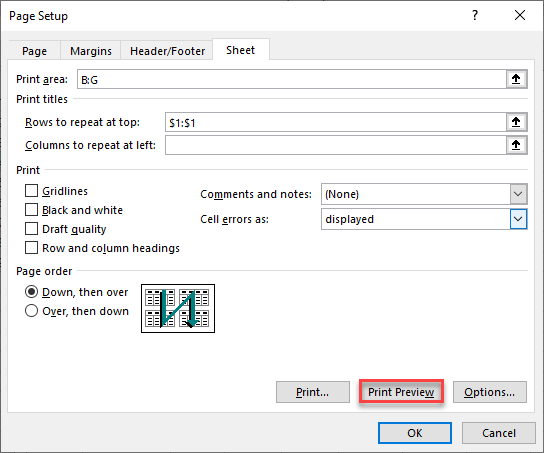
When the Print Preview screen appears, you can see that the first row is printed at the top of the first page. If you switch to Page 2, there is also the first row at the top of it and this is the case on every page in the document.
Just like repeating rows at the top, you can also repeat columns on the left side of every page. The only difference is that, in the Page Setup window, you need to select one or more columns in the Columns to repeat at left box.
Define Print Titles in Google Sheets
Repeating rows or columns when printing works differently in Google Sheets. Here, you can repeat only rows and columns that are frozen in the worksheet. Therefore, we’ll first show how to freeze top rows or left columns and then how to print them.
Freeze Top Rows
If you want to freeze one or more rows at the top of the worksheet in Google Sheets, you need to follow these steps:
If you want to freeze one or more rows at the top of the worksheet in Google Sheets, follow these steps:
First, select the row(s) that you want to freeze. In this case, select Row 1, as you want only the heading row to be frozen.
Next, in the Menu, go to View > Freeze > Up to current row (1).
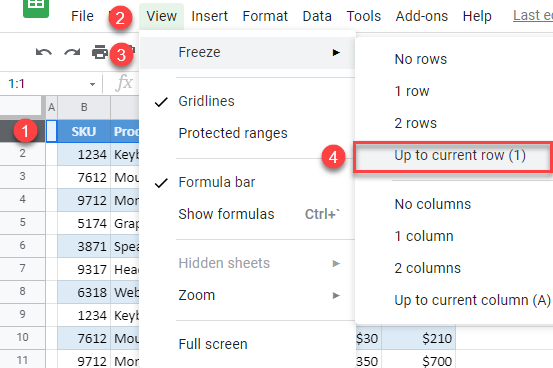
Note that you could also just select 1 row in this case, since you want to freeze just the first row, but to freeze multiple rows, you need to click Up to current row.
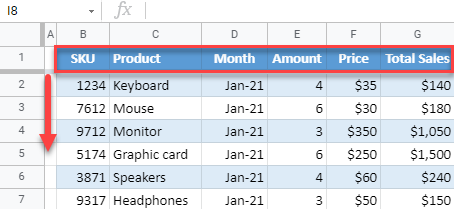
As a result, the first row is fixed when you scroll down the worksheet.
Repeat Frozen Rows When Printing
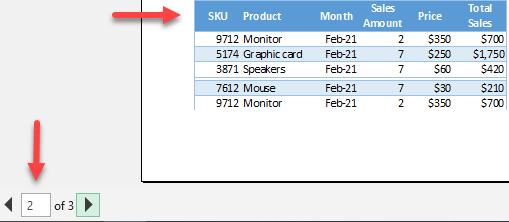
Now you can see the Print Preview of the worksheet and set the rows to repeat on each page.
- In the Menu, go to File > Print (or use the keyboard shortcut CTRL + P).
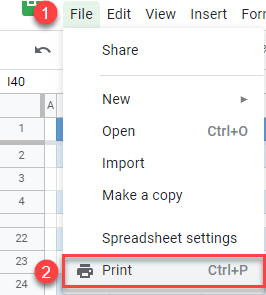
- Now in the print options on the left side, expand the headers and footers section, and check Repeat frozen rows.
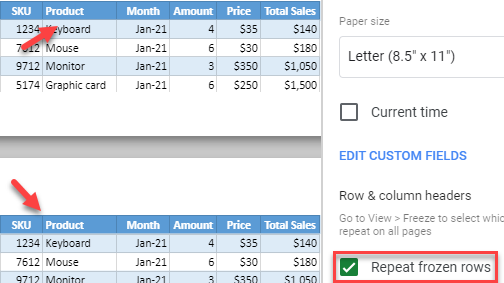
As you can see in the Print Preview, the first row prints on both pages.
In a similar way, you can also freeze column(s) on the left side and repeat them on every page when printing. You just need to check Repeat frozen columns in the print settings.
