Editing Excel VBA Macros
Written by
Reviewed by
Working with Excel VBA Macros
Macros in Excel are stored as VBA code, and sometimes you’ll want to edit this code directly. This tutorial will cover how to view and edit macros, describe some macro debugging techniques, and give some common editing examples.
View Macros
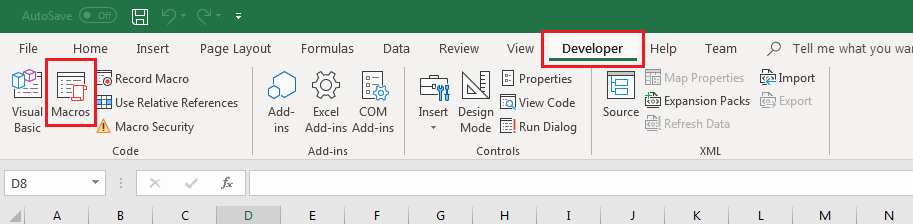
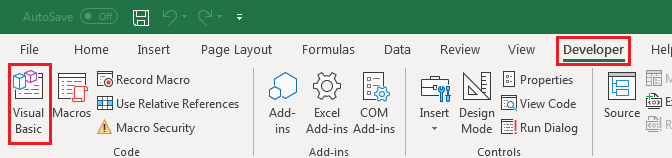
A list of macros can be shown in the Macros dialog. To view this dialog, select the Developer tab on the ribbon and click the Macros button.
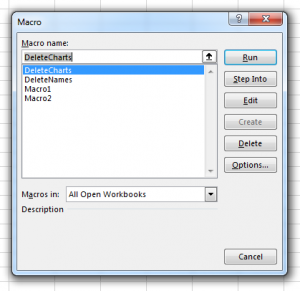
If multiple workbooks are open, macros from all workbooks will be shown in the list. Macros in the active workbook will appear by name alone, while macros in other workbooks will be prefixed by the workbook name and an exclamation point (i.e. “Book2!OtherMacro”).
Open a Macro for Editing
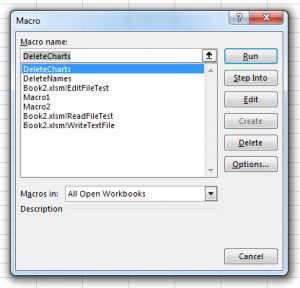
You can use the Macro dialog to open the code for a macro by selecting the macro’s name and clicking the Edit button. This will open the macro in the VB Editor.
Alternatively, you can open the VB Editor directly by clicking the Visual Basic button on the Developer tab, or by pressing the ALT+F11 keyboard shortcut.
Using this method, you will need to navigate to your desired macro (also called ‘procedure’). We will go over the VBA Editor layout:
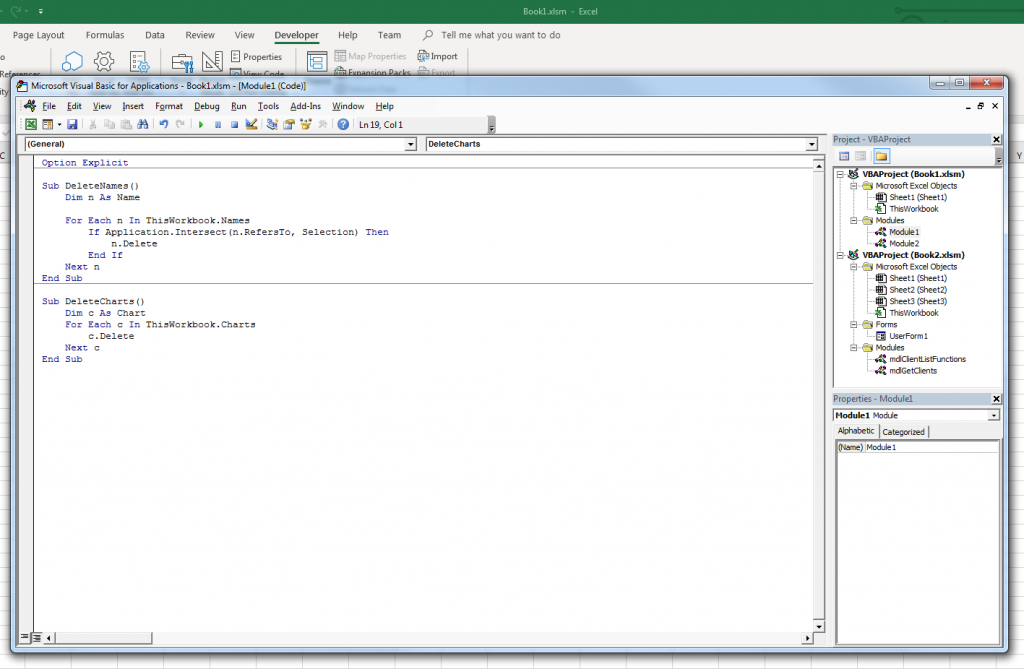
Overview of the VB Editor
The VB Editor has several windows; in this tutorial we’ll cover the Project Window, the Properties window, and the Code Window.
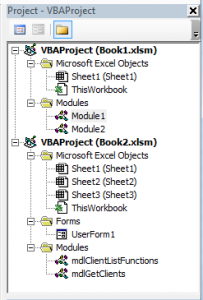
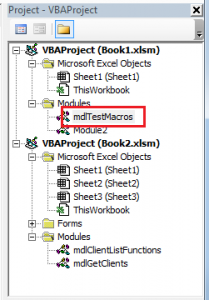
Project Window
The Project Window shows each Excel file as its own project, with all the objects in that project categorized by type. Recorded macros will appear in the “Modules” category, usually in the object “Module1”. (If your project has multiple Modules and you’re not sure where your macro is stored, simply open it from the aforementioned Macros dialog.)
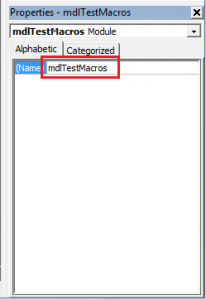
Properties Window
The Properties Window shows the properties and associated values of an object – for example, clicking on a worksheet object in the Project Window will show a list of properties for the worksheet. Property names are on the left, and property values are on the right.
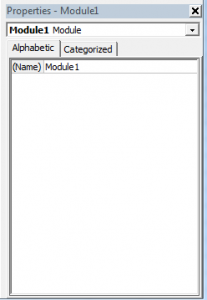
Selecting a module in the Project window will show it has only one property, “(Name)”. You can change the name of a module by double-clicking the property’s value, typing a new name, and pressing Enter. Changing a module’s name will rename it in the Project Window, which is useful if you have a lot of modules.
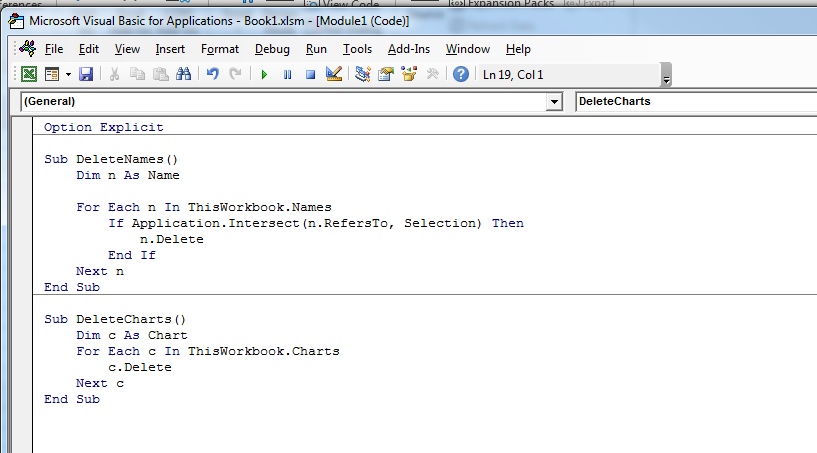
Code windows
Code windows are special text editors in which you can edit your macro’s VBA code. If you wanted to see the code for a macro located in Module1, you would double-click ‘Module1’ in the Project Window.
Running Macros in the VB Editor
Macros can be run directly from the VB Editor, which is useful for testing and debugging.
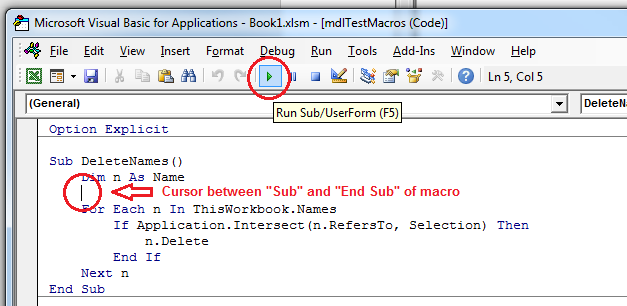
Running a Macro
- In the Project Window, double-click the module containing the macro you want to test (to open its Code window)
- In the Code window, place the cursor anywhere on the macro’s code between “Sub” and “End Sub”
- Click the Run button on the toolbar, or press keyboard shortcut F5
“Step-Through” a Macro
Instead of running the macro all-at-once, you can run the macro one line at a time, using a keyboard shortcut to “step through” the code. The macro will pause on each line, allowing you to ensure that each line of code does what you expect in Excel. You can also stop a macro from continuing at any time using this method.
To “step through” a macro:
- In the Project Window, double-click the module containing the macro you want to test (to open its Code window)
- In the Code window, place the cursor anywhere on the macro’s code
- Press the keyboard shortcut F8 to begin the “step-through” process
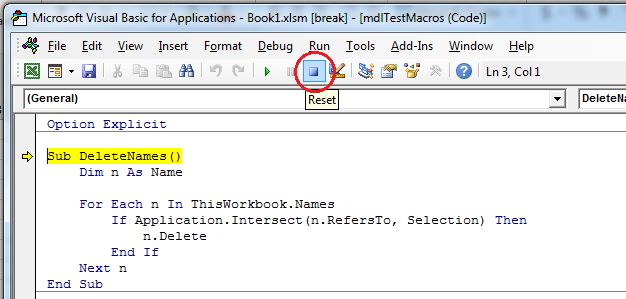
- Press F8 repeatedly to advance code execution, indicated by the yellow highlight in the Code window
- To stop a macro from continuing, press the Reset button
Why Edit VBA Macros?
The macro recorder – while effective – is also very limited. In some cases it produces slow macros, records actions you didn’t intend to repeat, or records things you didn’t think you were doing. Learning to edit your macros will help them run faster, more efficiently, and more predictably.
Besides fixing those issues, you’ll also gain a massive increase in productivity when you harness the full power of macros. Macros don’t just have to be recordings of tasks – macros can include logic so they only perform tasks under certain conditions. In just a couple of minutes you can code loops that repeat a task hundreds or thousands of times in one go!
Below, you’ll find some handy tips to help optimize your macro code, as well as tools to make your macros work harder and smarter.
Common Macro Editing Examples
Speed Up Macros
If you’ve got a macro that takes a long time to run, there may be a couple of reasons why it’s running slowly.
For one: when a macro runs, Excel will show everything as it happens in real-time – while it may look fast to you, actually showing the work is a significant performance hit. One way to make Excel run significantly faster is by telling it to stop updating the screen:
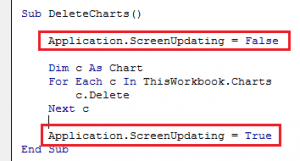
' Disable Screen Updating
Application.ScreenUpdating = False

' Enable Screen Updating
Application.ScreenUpdating = True
The line “Application.ScreenUpdating = False” means you won’t see the macro working, but it’ll run much faster. Note that you should always set ScreenUpdating to True at the end of your macro, or else Excel might not act the way you expect later!
Another way to speed up macros: turn off auto-calculation in the macro. If you’ve worked with complex spreadsheets, you’ll know that small changes can trigger thousands of calculations that take time to complete, which is why many people turn off auto-calculation in Excel’s options. You can also toggle this with VBA code, so your macro will still work quickly on other computers. This helps in cases when you’re copy-pasting a lot of formula cells, or causing a lot of calculations to trigger as you paste data into a range:
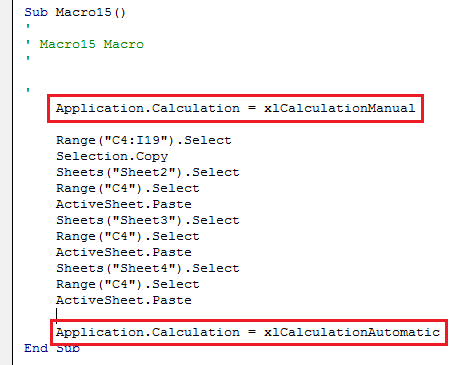
' Disable Auto-calculation
Application.Calculation = xlCalculationManual

' Enable Auto-calculation
Application.Calculation = xlCalculationAutomatic
Add Loops and Logic (If Statements)
The macro recorder saves all your actions as code in a language called VBA. VBA is more than just a way of recording actions in Excel – it’s a programming language, which means it can contain code to make decisions about what actions to perform, or repeat actions until a condition is met.
Looping
Say you wanted to make a macro that prepared a report, and as part of that macro you had to add nineteen sheets to the workbook, for a total of twenty. You could record yourself clicking the (+) button over and over, or you could write a loop that repeats the action for you, like this:
Sub ReportPrep()
    Dim i As Long

    For i = 1 To 19
        Sheets.Add
    Next i
End Sub
In this example, we use a For loop, which is a kind of loop that iterates through a range of items. Here, our range is the numbers 1 through 19, using a variable named ‘i’ so the loop can keep track. Inside our loop, there’s only one action being repeated between the for and next lines (the sheet adding), but you can add as much code inside the loop as you want to do things like format the sheet, or copy and paste data to each sheet – whatever you want to repeat.
If Statements
An If statement is used to decide if some code runs or not, using a logical test to make the decision. Here’s a simple example:
Sub ClearIfSmall()
    If Selection.Value < 100 Then
        Selection.Clear
    End If
End Sub
This simple example shows how the If statement works – you test some condition that is either True or False (is the value of the selected cell less than 100?), and if the test returns True, the code inside runs.
A shortcoming of this code is that it only tests one cell at a time (and would fail if you selected multiple cells). This would be more useful if you could… loop through every selected cell and test each one…
Sub ClearIfSmall()
    Dim c As Range

    For Each c In Selection.Cells
        If c.Value < 100 Then
            c.Clear
        End If
    Next c
End Sub
In this example, there’s a slightly different For loop – this one doesn’t loop through a range of numbers, but instead loops through all the cells in the selection, using a variable named ‘c’ to keep track. Inside the loop, the value of ‘c’ is used to determine if the cell should be cleared or not.
Loops and If statements can be combined any way you like – you can put loops inside loops, or one If inside another, or use an If to decide if a loop should run at all.
Remove Scrolling Effects
A common reason to edit macro code is to remove screen scrolling. When recording a macro, you may have to reach other areas of a worksheet by scrolling, but macros don’t need to scroll to access data.
Scrolling can clutter your code with hundreds or even thousands of lines of unnecessary code. Here’s an example of the code that gets recorded when you click and drag on the scrollbar:
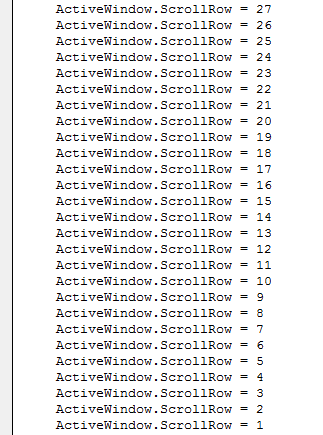
This kind of code is completely unnecessary and could be deleted without affecting any other functionality. Even if you wanted to retain the scrolling, this code could still be condensed into a loop.
Remove redundant code
Recorded macros tend to add a lot of redundant code that don’t necessarily reflect what you want the macro to do. Take the following recorded code for example, which records changing a font name on a cell:
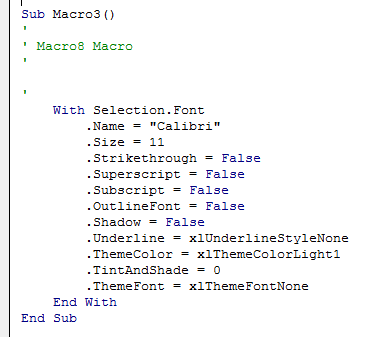
Even though only the font name was changed, eleven (11) font changes were recorded like the font size, the text effects, etc. If the intent of the macro was to only change the font name (while leaving all other properties alone) this recorded macro wouldn’t work!
It’s possible to change this macro so that it changes only the font name:
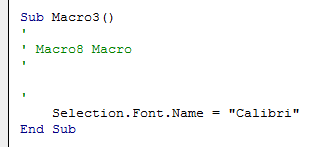
Not only will this macro work as intended now, but it’s also much easier to read.
Remove Cursor Movements
Another thing that gets recorded in macros are worksheet and cell selections. This is a problem because a user can easily lose track of what they were just working on if the cursor moves to a different position after a macro runs.
As with scrolling, you may need to move the cursor and select different cells to perform a task, but macros don’t have to use the cursor to access data. Consider the following code, which copies a range and then pastes it into three other sheets:
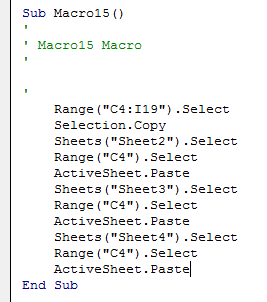
There’s a few problems with this code:
- The user will lose their previous place in the workbook
- The macro doesn’t specify what sheet we’re copying from – this could be a problem if the macro was run on the wrong sheet
Additionally, the code is difficult to read and wasteful. These issues can be resolved easily enough:
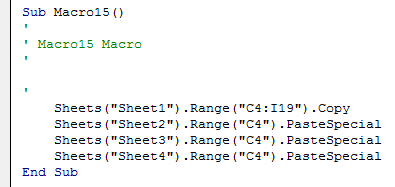
In this code, it’s clear to see that we’re copying from Sheet1, and neither the active worksheet nor the selected range need to change in order to paste the data. (One significant change is the use of “PasteSpecial” instead of “Paste” – Range objects, like “Range(“C4″)”, only have access to the PasteSpecial command.)
Whenever code becomes full of references to “.Select” and “Selection”, it’s a clue that there’s room to optimize that code and make it more efficient.
