Writing VBA Macros From Scratch
Written by
Reviewed by
Excel’s macro recorder has a lot of power, but it has its limitations. As covered in another article, the macro recorder often records unnecessary code and can’t record things like logic or interactions with other programs. It can also be hard to use for longer macros – you may find yourself storyboarding your actions beforehand just to avoid making costly mistakes.
This article aims to help you begin coding macros from scratch in VBA. You’ll learn where Macros are stored, write a basic macro, and learn the basics of programming in VBA using variables, logic, and loops.
Getting Started
VBA and the Visual Basic Editor
VBA, or Visual Basic for Applications, is the language that macros are written in. All macros are stored as VBA code, whether they’re hand-coded or created with the macro recorder.
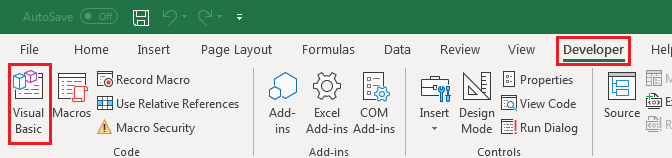
You can access all the VBA code in a workbook using the Visual Basic Editor. This is a special text editor and debugger that’s built-in to all office apps, including Excel. Typically, you’ll open this editor with the ALT+F11 keyboard shortcut in Excel, but you can also access it from Excel’s Developer tab if you have it enabled.
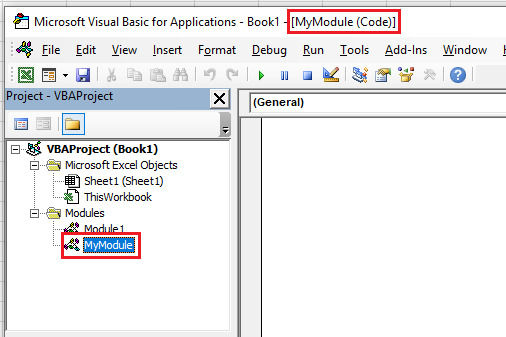
The Project Explorer
The Project Explorer is a window inside the VB Editor that shows you all the items that can have VBA code in them. If you don’t see this window, press F5 to make it appear or select Project Explorer from the View menu.
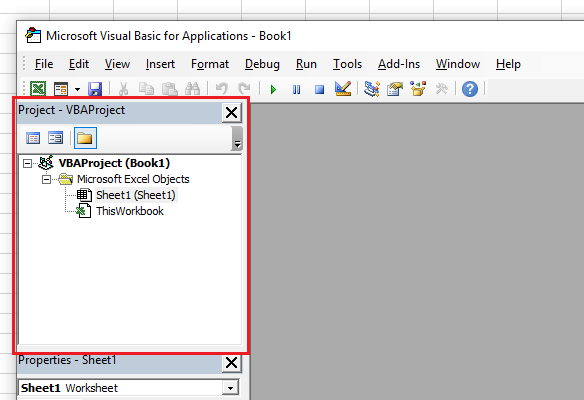
Double-clicking an item in the Project Explorer will show the code for that item. There are several types of items that can appear in the Project Explorer:
- Workbooks
- Worksheets
- UserForms
- Class Modules
- Modules (macros are stored in these items)
Although all these item types can include VBA code, the best practice is to code macros in Modules.
Making Your First Macro
Using the Macros List
The Macros List shows you all the macros in your workbook. From this list you can edit an existing macro, or create a new one.
To create a new macro using the Macros list:
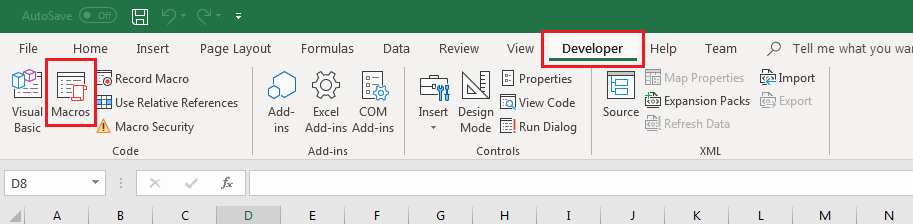
- Select the Developer tab and click Macros (or press ALT+F8)
- Type in a new name for your macro, then click “Create”
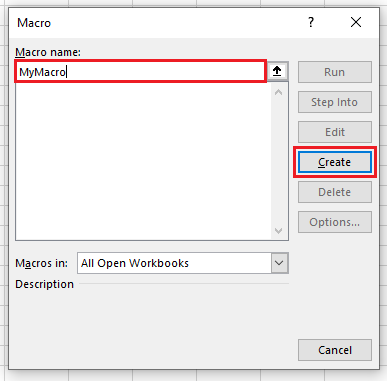
After clicking “Create” the VB Editor will appear, showing the newly created macro. Excel will create a new module for the macro if necessary.
Manually in the VB Editor
You can add a new macro manually without the Macros list. This is the better option if you’d like to specify the module the macro is saved in.
To add a macro manually:
- Open the VB Editor (ALT+F11)
- Either:
- Add a new module by clicking Insert > Module on the menu (the module will automatically open)

-
- OR, double-click an existing module in the Project Explorer to open it
- In the module, type in the code for your new macro
Sub MyMacro()

End Sub
These two lines indicate the beginning and end of a macro named “MyMacro” (note the parentheses, which are required). This will show up in the “View Macros” dialog in Excel and can be assigned to a button (even though it doesn’t do anything yet).
Add some Code to the Macro
Now, let’s add some code between the “Sub” and “End Sub” lines to make this macro actually do something:
Sub MyMacro()
    Range(“A1”).Value = “Hello World!”
End Sub
Basic Code Structures
The Range Object
Excel VBA uses the Range Object to represent cells on a worksheet. In the example above, a Range object is created with the code Range(“A1”) in order to access the value of cell A1.
Range Objects are primarily used to set cell values:
Range(“A1”).Value = 1Range(“A1”).Value = "First Cell"Notice that when defining cell values as numbers, you just enter in the number, but when entering text you must surround the text with quotations.
Ranges can also be used to access many properties of cells like their font, borders, formulas, and more.
For example, you can set the font of a cell to Bold like this:
Range(“A1”).Font.Bold = TrueYou can also set the formula of a cell:
Range(“A1”).Formula = “=Sum(A2:A10)”In Excel, you might select a block of cells with the cursor (say, from A1 to D10) and set them all to bold. Range objects can access blocks of cells like this:
Range(“A1:D10”).Font.Bold = TrueYou can also refer to several cells/blocks at once:
Range(“A1:D10,A12:D12,G1”).Font.Bold = TrueThe format for this is the same as the format you’d use when selecting cells for the SUM() formula in Excel. Each block is separated by a comma, and blocks are denoted by the top-left and bottom-right cells separated with a colon.
Finally, Range objects have built-in methods to perform common operations on a worksheet. For example, you might want to copy some data from one place to another. Here’s an example:
Range(“A1:D10”).Copy
Range(“F1”).PasteSpecial xlPasteValues
Range(“F1”).PasteSpecial xlPasteFormats
This copies cells A1:D10 to the clipboard, and then does a PasteSpecial() starting in cell C1 – just like you’d do manually in Excel. Note this example shows how to use PasteSpecial() to paste only Values and Formats – there are parameters for all the options that you’d see in the Paste Special dialog.
Here’s an example pasting “All” to another worksheet:
Range(“A1:D10”).Copy
Sheets(“Sheet2”).Range(“A1”).PasteSpecial xlPasteAll
If Statements
With an If statement, you can make a section of code run only “if” a certain statement is true.
For example, you may want to make a cell bold and color it red, but only “if” the value in the cell is less than 100.
If Range(“A4”).Value < 100 Then
    Range(“A4”).Font.Bold = True
    Range("A4").Interior.Color = vbRed
End If
The proper structure of an If statement is as follows (square brackets indicate optional components):
If <condition> Then
[ElseIf <another-condition> Then]
[Else]
End If
You can include as many ElseIf blocks as you like to test multiple conditions. You can also add an Else block that only runs if none of the other conditions in the If statement are met.
Here’s another example based on the previous one, where the cell is formatted several different ways depending on the value:
If Range("A4").Value < 100 Then
    Range("A4").Font.Bold = True
    Range("A4").Interior.Color = vbRed
ElseIf Range("A4").Value < 200 Then
    Range("A4").Font.Bold = False
    Range("A4").Interior.Color = vbYellow
Else
    Range("A4").Font.Bold = False
    Range("A4").Interior.Color = vbGreen
End If
In the above example, the cell is un-bolded in the ElseIf blocks where the value isn’t under 100. You can nest If statements to avoid duplicating code, like this:
If Range("A4").Value < 100 Then
    Range("A4").Font.Bold = True
    Range("A4").Interior.Color = vbRed
Else
    Range("A4").Font.Bold = False  ‘ unbolding the font only once
    If Range("A4").Value < 200 Then
        Range("A4").Interior.Color = vbYellow
    Else
        Range("A4").Interior.Color = vbGreen
    End If
End If
Variables
A Variable is a piece of memory used to store temporary information while a macro is running. They’re often used in loops as iterators, or to hold the result of an operation that you want to use several times throughout a macro.
Here’s an example of a variable and how you might use it:
Sub ExtractSerialNumber()
    Dim strSerial As String  ‘ this is the variable declaration
                             ' 'As String' means this variable is meant to hold text

    ' setting up a pretend serial number:
    Range("A4").Value = “serial# 804567-88”

    ' parse out the serial number from cell A4 and assign it to the variable
    strSerial = Mid(Range(“A4”).Value, 9)

    ' now use the variable twice, instead of having to parse the serial number twice
    Range(“B4”).Value = strSerial
    MsgBox strSerial
End Sub
In this basic example, the variable ‘strSerial’ is used to extract the serial number from cell A4 using the Mid() function, and then gets used in two other places.
The standard way to declare a variable is as follows:
Dim whatevername [As type]
- whatevername is the name you decide to give your variable
- type is the data type of the variable
The “[As type]” part can be omitted – if so, the variable is declared as a Variant type, which can hold any kind of data. While perfectly valid, Variant types should be avoided since they can lead to unexpected results if you’re not careful.
There are rules for variable names. They have to start with either a letter or an underscore character, can’t have spaces, periods, commas, quotation marks, or the characters “! @ & $ #”.
Here’s some examples of variable declarations:
Dim strFilename As String   ' good name style - descriptive and uses prefix

Dim i As Long               ' bad name style - acceptable only for some iterators

Dim SalePrice As Double     ' okay name style - descriptive, but doesn't use a prefix

Dim iCounter                ' okay name - not too descriptive, uses prefix, no data type
All of these examples use slightly different naming schemes, but all are valid. It’s not a bad idea to prefix a variable name with a short form of its data type (as per some of these examples), since it makes your code more readable at a glance.
VBA includes a lot of basic data types. The most popular ones include:
- String (used to hold text data)
- Long (used to hold whole numbers, i.e. no decimal places)
- Double (used to hold floating-point numbers, i.e. decimal places)
A full listing of VBA intrinsic data types can be found here: https://docs.microsoft.com/en-us/office/vba/language/reference/user-interface-help/data-type-summary
Range Object Variables
It’s possible to create variables that reference Range Objects, too. This is useful if you want to refer to a specific range in your code in several places – that way if you need to change the range, you only need to change it in one place.
When you create a Range object variable, you have to “set” it to an instance of a Range. For example:
Dim rMyRange As Range
Set rMyRange = Range(“A1:A10;D1:J10”)
Leaving the “Set” statement out when assigning a Range variable will result in an error.
Loops
Loops are blocks that repeat the code inside them a certain number of times. They’re useful to reduce the amount of code you have to write, and allow you to write one piece of code that performs the same actions on many different related items.
For-Next
A For-Next block is a loop that repeats a certain number of times. It uses a variable as an iterator to count how many times it has run, and this iterator variable can be used inside the loop. This makes For-Next loops very useful for iterating through cells or arrays.
Here’s an example that loops through cells in rows 1 to 100, column 1, and sets their values to the value of the iterator variable:
Dim i As Long
For i = 1 To 100
    Cells(i, 1).Value = i
Next i
The line “For i = 1 To 100” means that the loop starts from 1 and ends after 100. You can set any starting and ending numbers you like; you can also use variables for these numbers.
By default, For-Next loops count by 1. If you want to count by a different number, you can write the loop with an explicit Step clause:
For i = 5 To 100 Step 5This loop will start at 5, then add 5 to ‘i’ every time the loop repeats (so ‘i’ will be 10 on the second repetition, 15 on the third, and so on).
Using Step, you can make a loop count backwards too:
For i = 100 To 1 Step -1You can also nest For-Next loops. Each block requires its own variable to count with, but you can use those variables anywhere you like. Here’s an example of how that’s useful in Excel VBA:
Dim i As Long, j As Long
For i = 1 To 100
    For j = 1 To 100
        Cells(i, j).Value = i * j
    Next j
Next i
This allows you to loop through both rows and columns.
WARNING: although it’s allowed, you should NEVER MODIFY the iterator variable inside a For-Next block, since it uses that iterator to keep track of the loop. Modifying the iterator can cause an infinite loop and hang your macro. For example:
For i = 1 To 100
    i = 1
Next i
In this loop, ‘I’ will never get beyond 2 before being reset to 1, and the loop will repeat forever.
For-Each
For-Each blocks are very similar to For-Next blocks, except they don’t use a counter to specify how many times they loop. Instead, a For-Each block takes a ‘collection’ of objects (like a Range of cells) and runs as many times as there are objects in that collection.
Here’s an example:
Dim r As Range
For Each r In Range("A15:J54")
    If r.Value > 0 Then
        r.Font.Bold = True
    End If
Next r
Notice the use of the Range object variable ‘r’. This is the iterator variable used in the For-Each loop – every time through the loop, ‘r’ gets a reference to the next cell in the Range.
An advantage of using For-Each loops in Excel VBA is that you can loop through all cells in a range without nesting loops. This can be handy if you need to loop through all the cells in a complex range like Range(“A1:D12,J13, M1:Y12”).
One disadvantage of For-Each loops is that you have no control over the order in which cells are processed. Although in practice Excel will loop through cells in order, in theory it could process the cells in a completely random order. If you need to process cells in a particular order, you should use For-Next loops instead.
Do-Loop
While For-Next blocks use counters to know when to stop, Do-Loop blocks run until a condition is met. To do this, you use an Until clause on either the beginning or the end of the block, which tests the condition and causes the loop to stop when that condition is met.
Example:
Dim str As String
str = "Buffalo"
Do Until str = “Buffalo Buffalo Buffalo Buffalo Buffalo Buffalo Buffalo”
    str = str & " " & "Buffalo"
Loop
Range("A1").Value = str
In this loop, “Buffalo” is concatenated to ‘str’ every time through the loop Until it matches the expected sentence. In this case, the test is performed at the start of the loop – if ‘str’ was already the expected sentence (which it isn’t because we didn’t start it that way, but if) the loop wouldn’t even run.
You can make the loop run at least once by moving the Until clause to the end, like this:
Do
    str = str & " " & "Buffalo"
Loop Until str = “Buffalo Buffalo Buffalo Buffalo Buffalo Buffalo Buffalo”
You can use whichever version makes sense in your macro.
WARNING: you can cause an infinite loop with a Do-Loop block if the Until condition is never met. Always write your code so that the Until condition will definitely be met when you use this type of loop.
What’s Next?
Once you’ve grasped the basics, why not try learning some more advanced techniques? Our tutorial at https://www.automateexcel.com/excel/learn-vba-tutorial/ will build on everything you’ve learned here and expand your skills with Events, UserForms, code optimization, and much more!
