How to Run a Macro in Excel
Written by
Reviewed by
Although running a macro in Excel isn’t hard, there are lots of ways to run them. Some ways are meant to make using macros easier, while other ways can change the way a user interacts with your workbook entirely. In this article we’ll cover some obvious ways to run macros run like the Macros List and Button controls, and some more obscure ways like the VB Editor and Events.
First: Ensure Macros are Enabled
Excel’s security features will disable macros by default. When opening a macro-enabled workbook, users are typically prompted if they’d like to enable macros.
If you’re not able to run macros, try following these instructions:
- Save the workbook
- Close the workbook, then open it again
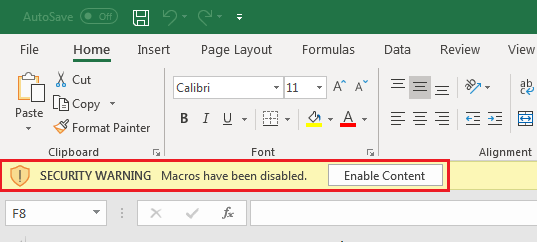
- When the workbook loads, you’ll see a Security Warning prompt (pictured below). Click Enable Content.
Run a Macro from the Macro List
A list of macros can be accessed from the View tab. To view this list:
- Select the View tab
- Click the button labelled Macros to bring up the Macro list

- Select the macro you want to run from the list, then click the Run button
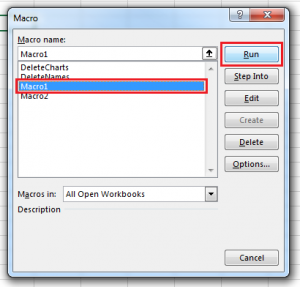
You can also show the Macro List at any time by pressing ALT+F8.
Run a Macro using a Keyboard Shortcut
You can assign a keyboard shortcut to a macro that you use often, in the form of CTRL+<letter> or CTRL+SHIFT+<letter>. To do this:
- Bring up the Macro List (View > Macros, or ALT+F8)
- Select the macro you want to apply a shortcut to
- Click Options… to show the Macro Options sub-dialog
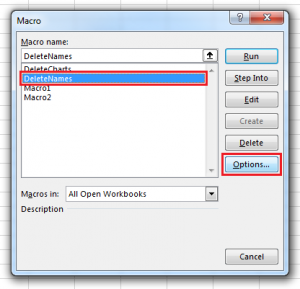
- In the textbox under Shortcut Key, type a single letter and then click OK. If you hold the SHIFT key while typing the letter, the label next to the box will show SHIFT as part of the shortcut

NOTE: it is highly recommended that you use SHIFT when creating a shortcut key! Excel uses CTRL+ shortcuts for itself, e.g. CTRL+C to Copy, or CTRL+V to Save. If you create a macro shortcut using these or other Excel shortcuts, you’ll overwrite the Excel shortcut until you re-assign the macro shortcut.
Run a Macro from the VB Editor
Macros can also be run from the VB Editor. The VB Editor allows you to review a macro’s code and make any changes you want before running it.
To run a macro in the VB Editor:
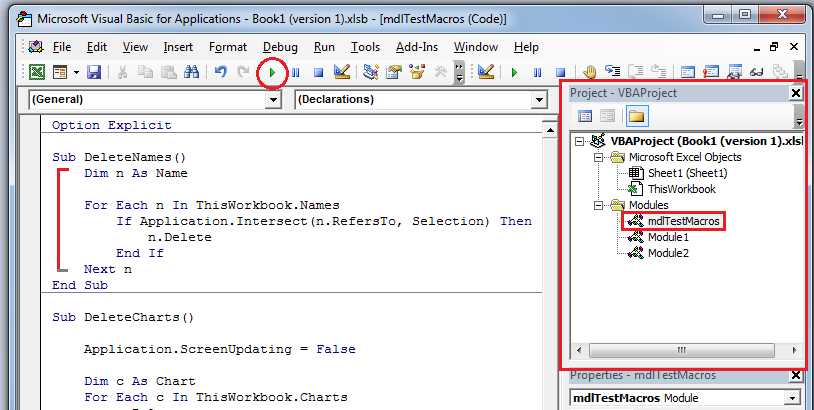
- Open the VB Editor (Developer tab > Visual Basic, or ALT+F11)

- In the Project window, double-click the module containing the macro you want to test
- In the module’s code window, place the cursor anywhere on the macro’s code between “Sub” and “End Sub”
- Click the Run button on the toolbar, or press keyboard shortcut F5
Run a Macro using a Button or Shape
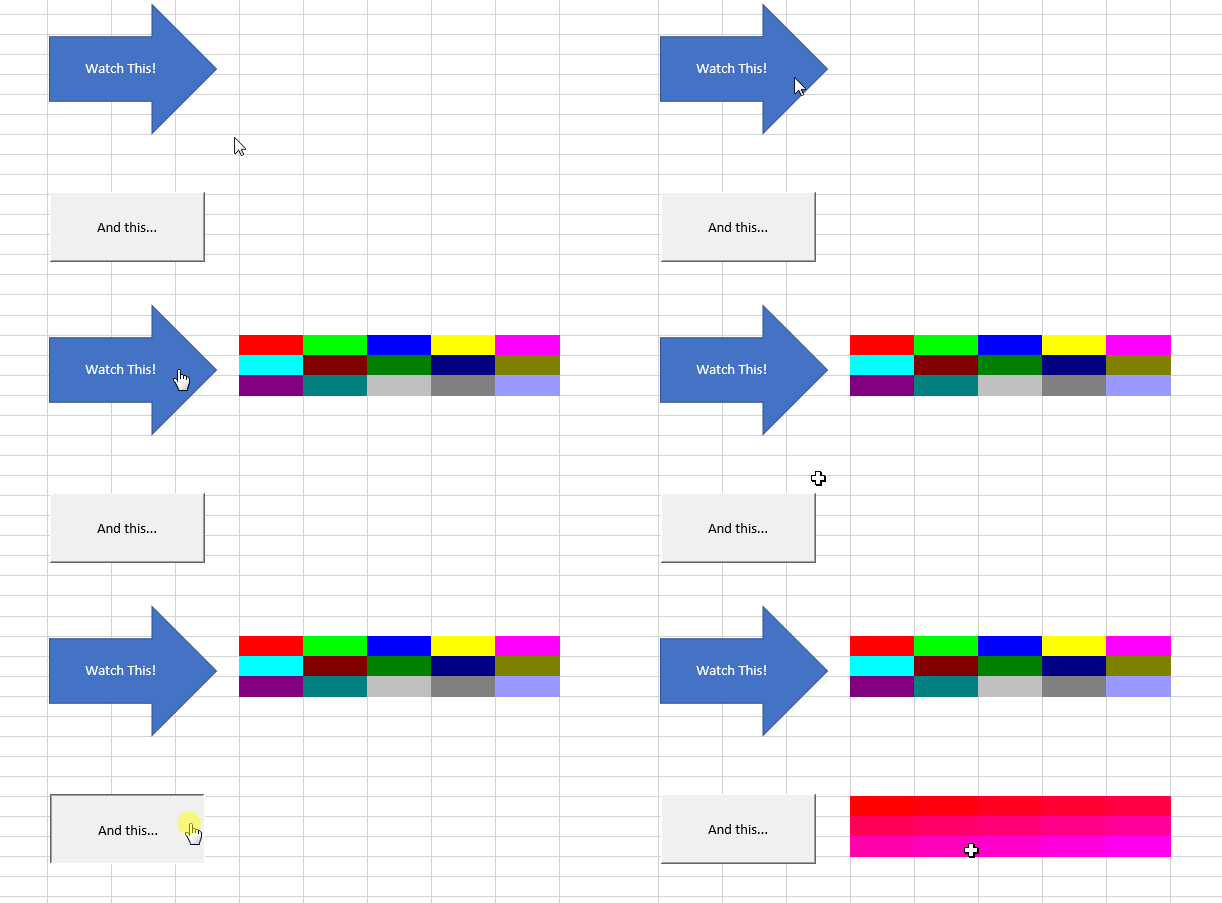
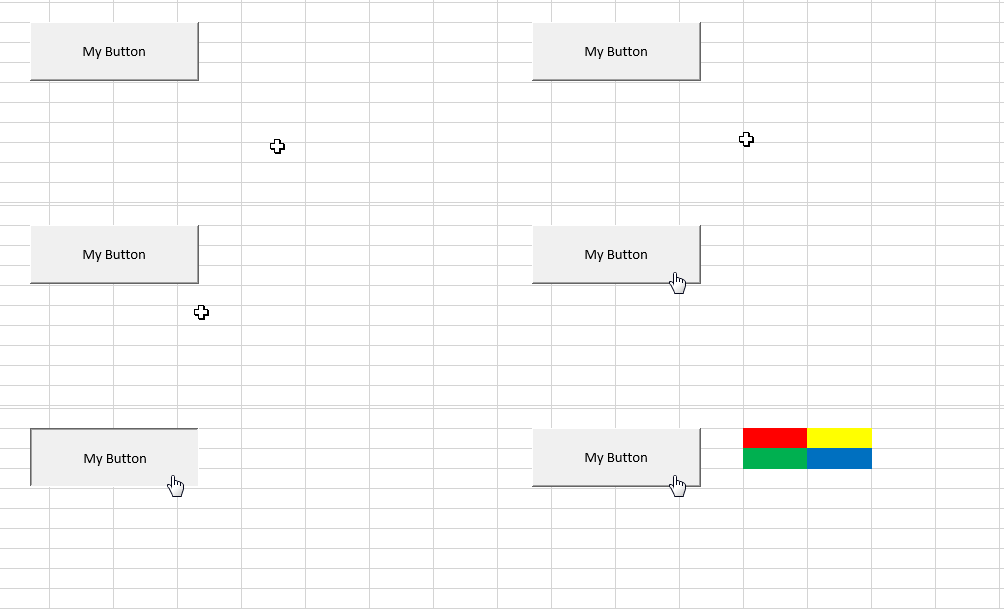
It’s often useful to have a control on the worksheet that a user can click to run a macro, like a Button control or a Shape. This is much quicker for end-users than opening lists of macros or digging through macro code in the VB Editor.
Information about how to create a clickable Button or Shape can be found here: Add a Button and Assign a Macro in Excel.
Auto-Run a Macro using Events in VBA
It’s possible to make a macro run when something happens in Excel – for example, when a workbook is opened or when a cell value is changed. These are called Events, and you can write VBA code for them to call macros or perform other operations.
To write code for an event, you’ll need to use the VB Editor. For example, to view events for the workbook:
- Open the VB Editor (ALT+F11)
- Double-click the ThisWorkbook object in the VB Editor’s Project Window
- Choose “Workbook” from the dropdown on the top-left of the code window
- Click the dropdown on the right to see a list of events
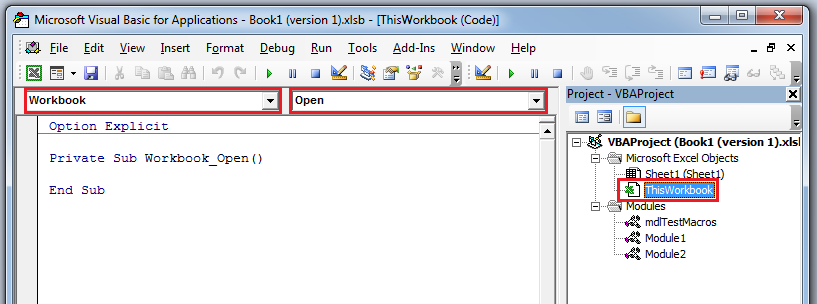
The following are a small, but useful sample of Excel Events that you could run macros from.
Workbook_Open()
The Workbook_Open() event fires when a workbook is opened. If you get the Security Warning after opening a workbook, this event fires after clicking “Enable Content”.
Private Sub Workbook_Open()

    MsgBox "Workbook Opened!"

End Sub
Workbook_BeforeClose(Cancel as Boolean)
Workbook_BeforeClose() fires when the user tries to close the workbook. It happens before any checks are done to see if the workbook needs to be saved.
The Cancel parameter can be set to True to stop the workbook from closing.
Private Sub Workbook_BeforeClose(Cancel As Boolean)

    If MsgBox("Are you sure?", vbYesNo + vbQuestion, "Close") = vbNo Then

        Cancel = True

    End If

End Sub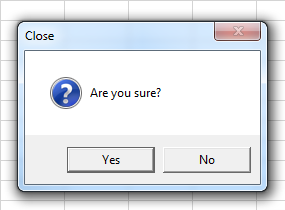
Worksheet_Change(ByVal Target As Range)
Worksheet_Change() fires when the value of a cell is changed – whether it’s changed by a macro, by a copy/paste operation, or by an external link. It does not fire when a value is recalculated via a formula, though.
The Target parameter represents the cells whose value have changed.
If you change the value of other cells inside this event, the event will fire again. This can possibly cause an infinite loop. If you need to change cell values without triggering this event, consider setting Application.EnableEvents to False first, and then set it back to True at the end of the event procedure.
Private Sub Worksheet_Change(ByVal Target As Range)

    MsgBox "Cells changed: " & Target.Address

    Application.EnableEvents = False
    Range("A2").Value = Range("A2").Value + Target.Cells.Count
    Application.EnableEvents = True

End Sub
Worksheet_SelectionChange(ByVal Target As Range)
This event fires whenever different cells are selected with the targeting reticle. The Target parameter represents the new cells that have been selected.
You can trigger this event with code as well, i.e. “Range(“A1”).Select”. As with Worksheet_Change(), you should be careful about selecting other cells inside this event, since you can cause an infinite loop. Use Application.EnableEvents.
Private Sub Worksheet_SelectionChange(ByVal Target As Range)

    If Target.Address = "$A$1" Then

        MsgBox "Cursor in home position."

    End If

End Sub
Stop a Running Macro
A running macro can be interrupted by pressing ESC or CTRL+BREAK. By default, an interrupted macro will show the following dialog:
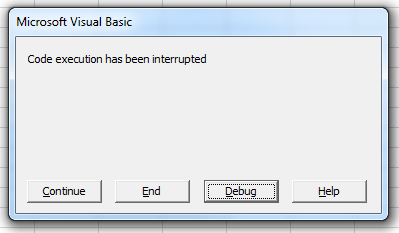
Clicking End will stop the macro, while Continue will resume it. Clicking Debug will open the macro in the VB Editor and focus the line of code that execution was paused on. (Inside the VB Editor you can stop or resume the macro using the Run or End buttons on the toolbar.)
Application.EnableCancelKey
You can disable the ability to stop a macro with ESC or CTRL+BREAK by setting the Application.EnableCancelKey property. This property has three possible values:
- xlInterrupt – this is the default value, which makes Excel show the dialog above
- xlDisabled – removes the ability to stop a running macro
- xlErrorHandler – when an interrupt attempt is made, an error is thrown that can be handled in code
Whenever code execution stops, Excel always resets the value of Application.EnableCancelKey back to xlInterrupt.
A good reason for using this property is security. For example, if you had a macro that temporarily unprotected parts of your workbook, a user could potentially stop the macro right after the unprotect and gain access to content you didn’t intend them to have. By setting Application.EnableCancelKey, you can completely disable their ability to do this, or handle their interruption gracefully with an Error Handler that re-protects the workbook.
Sub UpdateBaseData(ByVal NewData As Range, ByVal Target As Range)

    Application.EnableCancelKey = xlDisabled

    Target.Worksheet.Unprotect "MyPassword"
    NewData.Copy Target
    Target.Worksheet.Protect "MyPassword"

    Application.EnableCancelKey = xlInterrupt

End Sub
Force-Close Excel with the Windows Task Manager
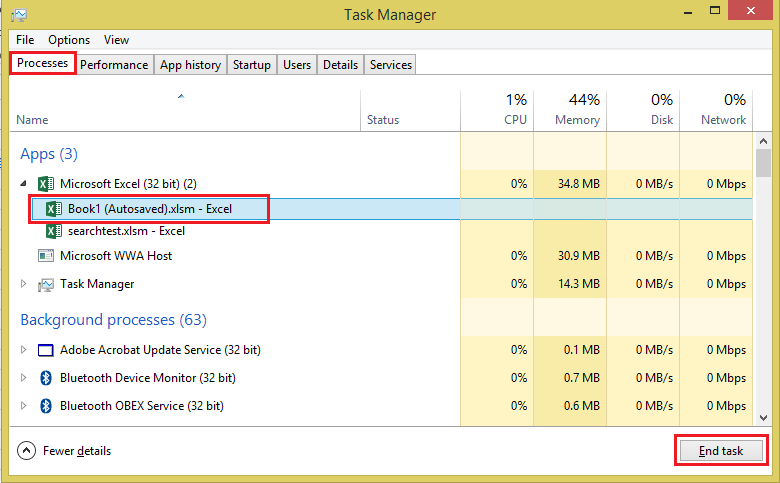
If the macro has ‘hung’, or Excel has become too busy to acknowledge an interrupt attempt, you may need to force-close Excel itself with the Windows Task Manager. (NOTE: if you do this, you may lose any unsaved work, and have to rely on an auto-recover version of your workbook.)
- Open the Task Manager directly using CTRL+SHIFT+ESC
- Select the “Processes” tab
- Expand the “Microsoft Excel” item to show all workbooks
- Select the workbook you want to close, then click End Task in the bottom-right corner
