How to Print in Excel & Google Sheets
Written by
Reviewed by
This tutorial demonstrates how to print in Excel and Google Sheets.
Printing in Excel can be a fast and simple process with many options and features available to help you setup your worksheet or workbook correctly and to print successfully. If you know that your worksheet is already set up in the way that you want it to appear, the fastest way to print is to use the Quick Print command in the quick access toolbar.

In this Article
Print in Excel: Quick Guide
Most of the time, you’ll need to change or confirm a few things before printing.
- First, ensure that you have a printer connected that is online and ready to print with the right size of paper inserted correctly.
- Then, set up your print area, the range of cells that you wish to print. If you wish to print your entire worksheet, make sure that worksheet is selected.
- Check that you are in the correct orientation – either landscape or portrait – and make sure your margins and paper size are correct.
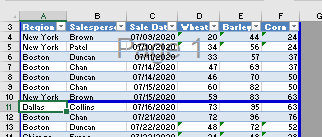
- Check your page breaks. This can be done in Page Break Preview.
- Set any print titles that you might need. Print titles are any rows you want repeated at the top of each page and/or any columns you want repeated at the left of each page. Check or select them correctly.
- Ensure that your headers and footers are set up correctly.
- Finally, in the Ribbon, go to File > Print to view your worksheet in Print Preview. Click Print if everything looks good.
Let’s have a look at the points above (plus a few more!) in more detail below.
Print a Worksheet
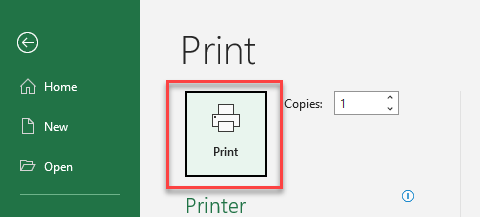
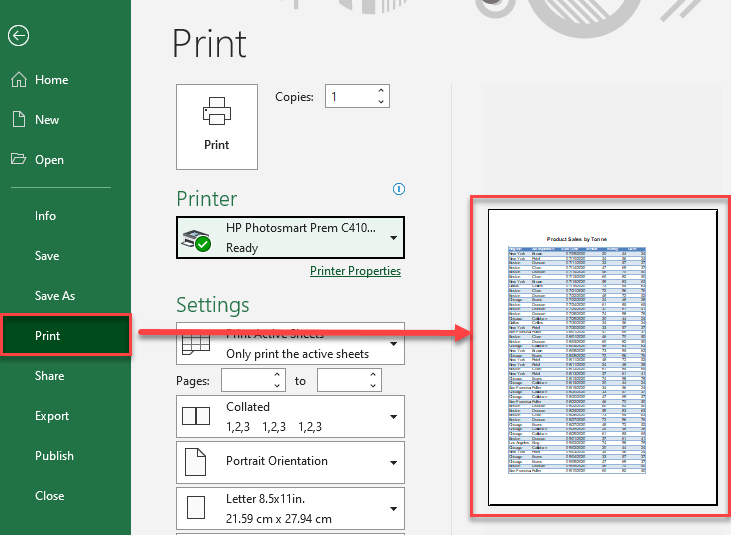
- Select the sheet you wish to print, and then in the Ribbon, go to File > Print or press CTRL + P.
- The selected sheet is shown in Print Preview. To print only the active sheet, click the Print.
Print a Workbook
- From anywhere within your workbook, in the Ribbon, go to File > Print or press CTRL + P.
- The active sheet in your workbook is shown in Print Preview. Under Settings, click the down arrow next to the default option and choose Print Entire Workbook.
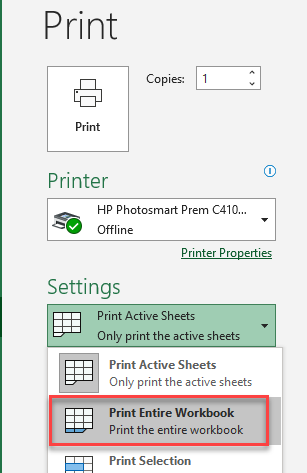
- Click Print to print your workbook.
Print Part of a Worksheet
- Select the cells in your worksheet that you wish to print, and then in the Ribbon, go to File > Print (or press CTRL + P).
- The active sheet is then shown in Print Preview. Under Settings, click the down arrow next to the default option and choose Print Selection. Print Preview updates to show only the selected cells.
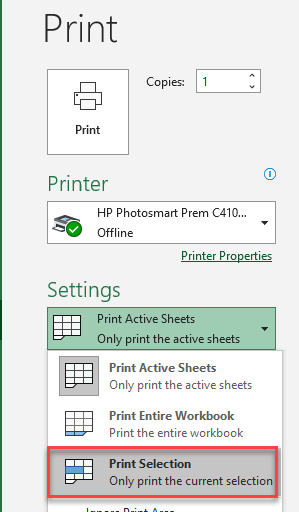
- Click Print to print your selection.
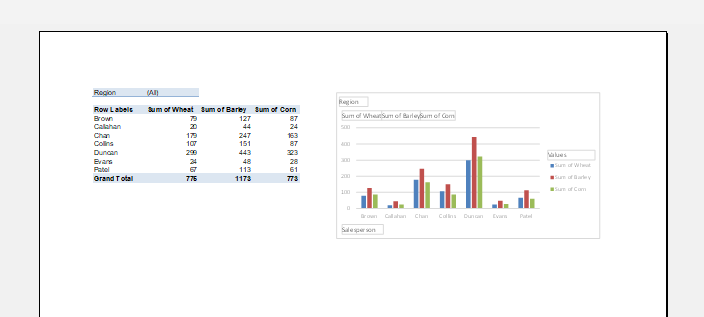
Print a Table
- Select the table you wish to print, and then in the Ribbon, go to File > Print or press CTRL + P.
- The active sheet in your workbook is shown in Print Preview. In the Settings section, click the down arrow next to the default print option and click Print Selected Table. Your print preview changes to show the selected table.
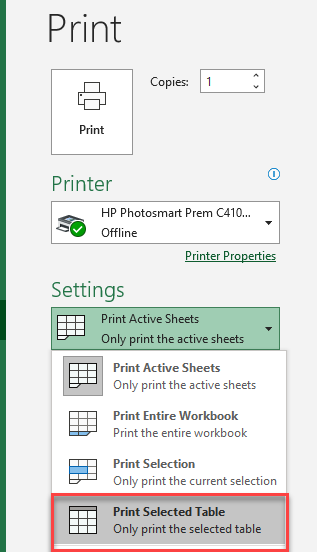
- Click Print to print your selection.
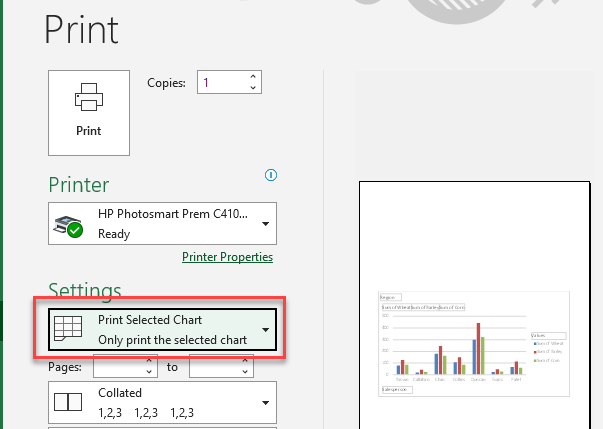
Print a Chart
- Select the chart that you wish to print, and then in the Ribbon, go to File > Print (or press CTRL + P).
- Under Settings section, choose Print Selected Chart.
Print to PDF
- From anywhere within your workbook, in the Ribbon, go to File > Print (or press CTRL + P).
- In the Printer Section, choose Microsoft Print to PDF.
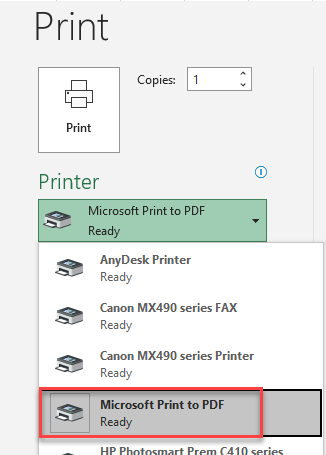
- Click the Print button to Print to PDF.
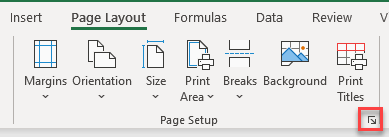
Page Layout
The Page Setup group in the Page Layout tab of the Ribbon enables you to set up the way your worksheet is printed.
You can either use the buttons in the group or you can open the Page Setup dialog box by clicking on the small arrow in the bottom-right corner of the group.
Margins
- In the Ribbon, go to Page Layout > Page Setup > Margins.
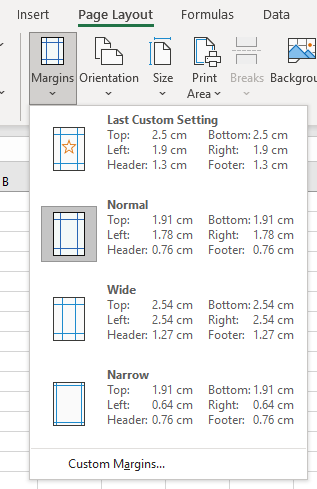
- You can choose one of the preset options available or click Custom Margins… at the bottom of the list to open the Page Setup dialog box.
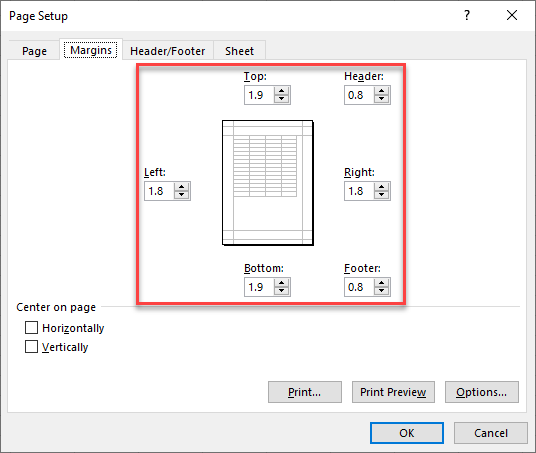
- You can set the left, right, top, and bottom margins, as well as the space reserved for headers and footers. Adjust the margins by using the up and down arrows for each side, and then click OK.
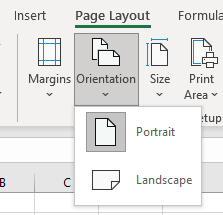
Orientation
In the Ribbon, go to Page Layout > Page Setup > Orientation to change the orientation of your worksheet when printed.
Size
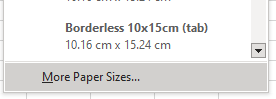
- In the Ribbon, go to Page Layout > Page Setup > Size to change the paper size of your worksheet when printed.
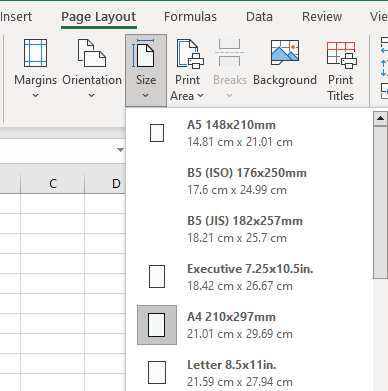
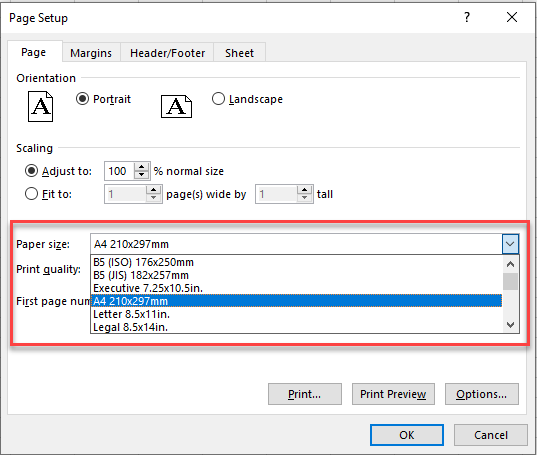
- For a size not already on the list, click More Paper Sizes… at the bottom.
- This opens the Page Setup dialog box. Select the page size you want from the Paper size drop down.
Print Area
- Select the range within your worksheet that you wish to print, and then in the Ribbon, go to Page Layout > Page Setup > Print Area > Set Print Area.
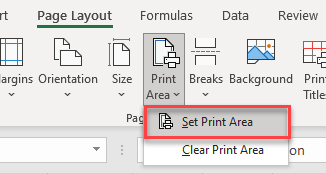
- To reset print areas, so that all populated cells would print, click Clear Print Area from the same menu.
Breaks
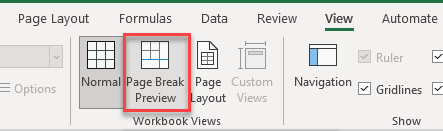
- Click in the cell in your worksheet where you want to insert a page break, and then in the Ribbon, go to Page Layout > Page Setup > Breaks > Insert Page Break.

- To view page breaks in your workbook, you need to be in Page Break Preview. In the Ribbon, go to View > Workbook Views > Page Break Preview.
OR
In the bottom-right corner of your worksheet, click the Page Break Preview icon to switch to Page Break Preview.

- Your worksheet displays the changes, and you can see the page break you inserted.
- To get rid of the page break, click Remove Page Break.
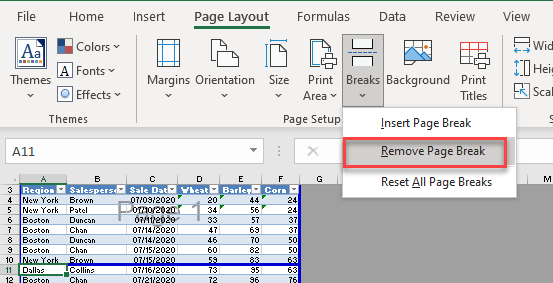
- To reset all the page breaks to their defaults, click Reset All Page Breaks.
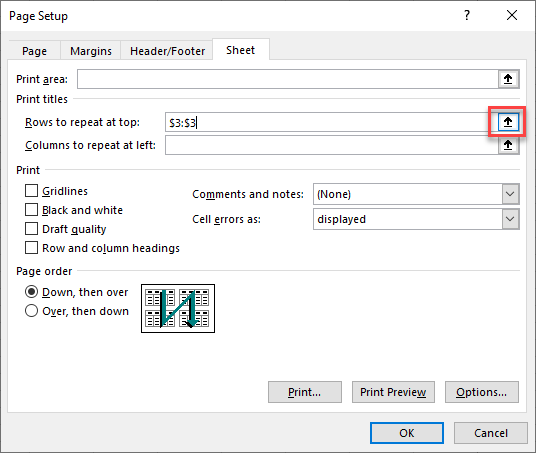
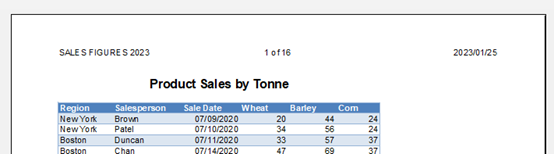
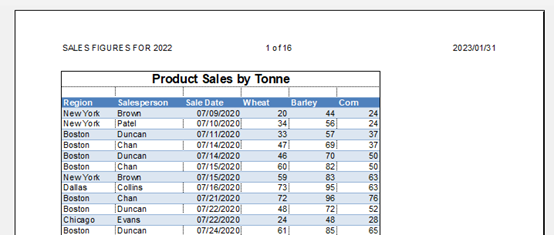
Print Titles
- In the Ribbon, go to Page Layout > Page Setup > Print Titles.

- You can repeat rows or columns at the top of each page that you print –To repeat a specific row, click in the Rows to repeat at top box, and then select the rows you wish to repeat.
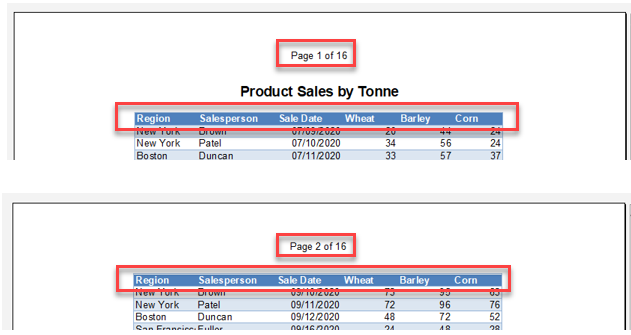
- When you click Print Preview from the Page Setup dialog box, you can see that the row you selected is repeated on each page.
Print Preview
Select the sheet you wish to print, and then in the Ribbon, go to File > Print (or press CTRL + P). The selected sheet is shown in Print Preview.
- In the Ribbon, go to Page Layout > Page Setup and click the small arrow in the bottom-right corner of the group.
- Click on the Header/Footer tab. Under Header, choose from the options provided.
-
- Click OK to set the header. Note that you can only see the header in Print Preview.
- The footer can be set and customized in the same way.
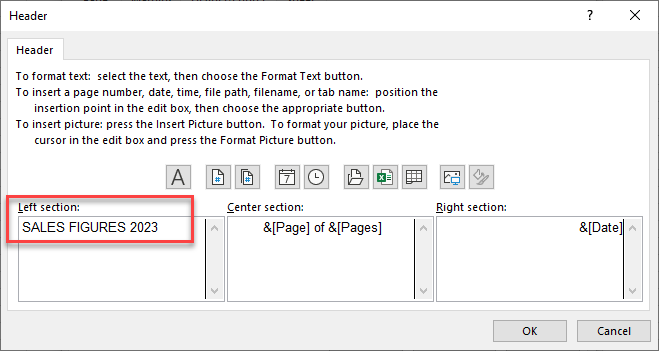
Custom Header
- If you wish to type in your own header, click Custom Header…
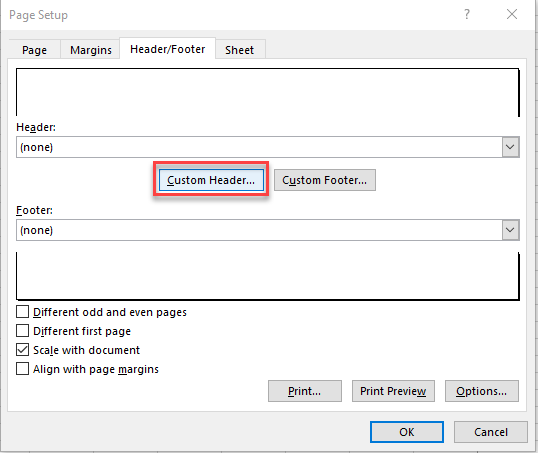
- Here, you can customize the left, center, and right sections of the printed page. The buttons along the top of these sections let you insert built-in options with a single click – options like the page number, name of the file, time and date, etc.
Click the information you want in each section.
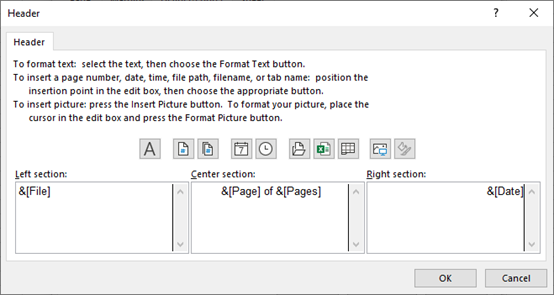
Alternatively, you can type a custom header into each section.
Print Gridlines
- In the Ribbon, go to Page Layout > Page Setup and click the small arrow in the bottom-right corner of the group.
- Click on the Sheet tab, and then tick the Gridlines box under Print.
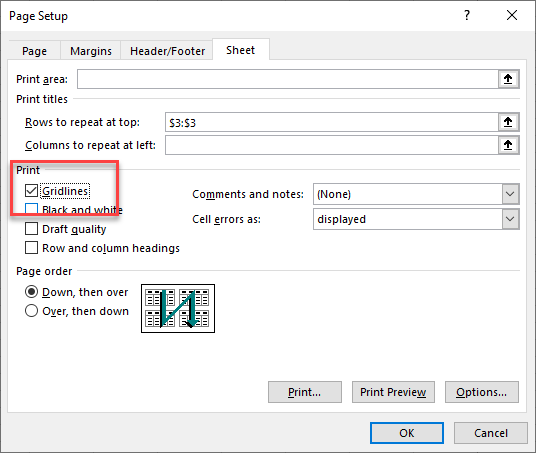
- When you click Print Preview, you can see that gridlines are visible along with the worksheet data, and therefore would be printed.
Print Comments and Notes
- In the Ribbon, go to Page Layout > Page Setup and click the small arrow in the bottom-right corner of the group.
- Click on the Sheet tab, and then choose from the Comments and notes drop down.

Change Page Resolution
- In the Ribbon, go to Page Layout > Page Setup and click the small arrow in the bottom-right corner of the group.
- In the Page tab, adjust the page resolution, if necessary, by choosing from the Print quality drop down. DPI stands for dots per inch; 600dpi prints at a higher quality than 300 dpi.
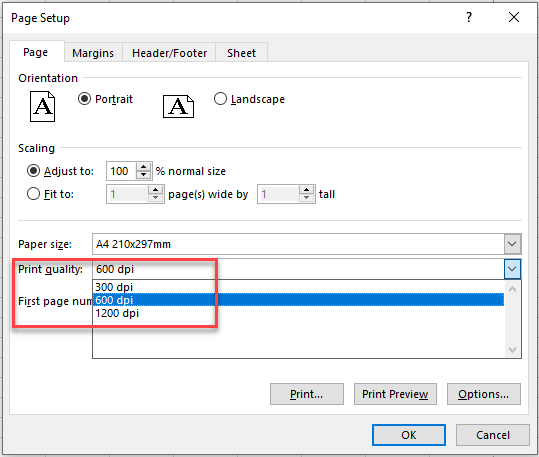
- Click OK to return to Excel.
Print with VBA
All options described above can also be achieved through VBA coding.
- In the VBE, create a module and type in the following macro.
Sub PrintSheet()
     ActiveWindow.SelectedSheets.PrintOut
End Sub- This prints all pages of the active sheet.
Print in Google Sheets
As in Excel, Print and Print Preview are reached by clicking the Print button in Google Sheets.
- In the Menu, go to File > Print.
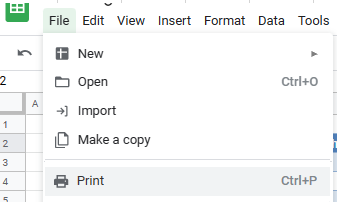
- This takes you to Print Settings, where you can set what you wish to print, be it your entire workbook, individual worksheet, table, chart, or selected cells.
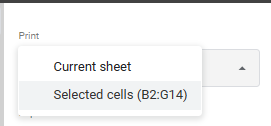
- From the menu on the right side of the screen, choose to print the Current sheet or Selected cells.
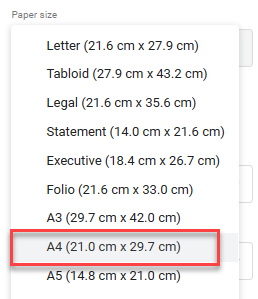
- Google Sheets sets the default paper size based on the printer that you have connected to your PC. Should you wish to set a custom paper size for your worksheet, choose that Paper size.
- The worksheet can be scaled from this menu by choosing a preset Scale or using a custom percentage.

- Margins can be adjusted to Normal, Narrow, or Wide.
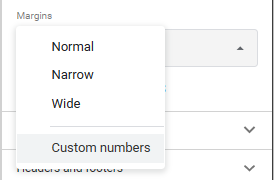
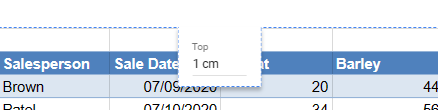
- Alternatively, click Custom numbers and type in the margins manually.
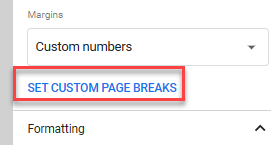
- Google Sheets automatically inserts page breaks for you where your worksheet flows over to more than one page. If desired, change these page breaks by clicking SET CUSTOM PAGE BREAKS to add your own breaks.
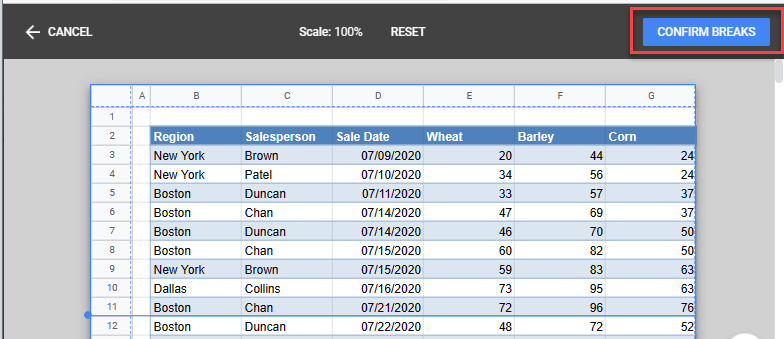
- Drag the page break to where you want it to be placed.
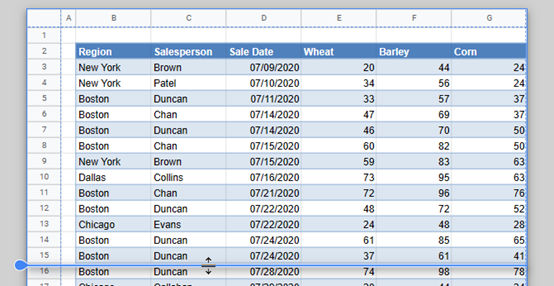
- Click Confirm Breaks to confirm your page breaks.
- Any page breaks that you have inserted can be toggled on or off by clicking the button to right of Custom page breaks. If you toggle this slider off, any custom page breaks are reset.
Alternatively, you can click EDIT to change the page breaks.
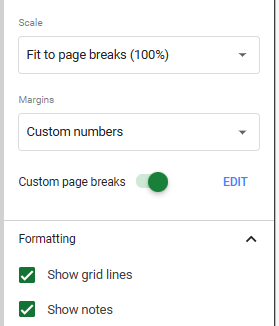
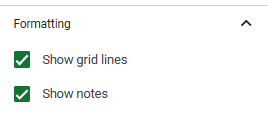
- Switch gridlines and notes on or off by ticking or unticking those options under Formatting.
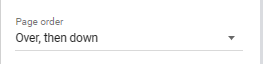
- Adjust printing order in the Page order drop down. Choose between Over, then down or Down, then over.
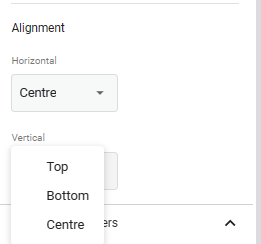
- Change the Alignment for both Horizontal and Vertical layout by choosing from each drop down.
- Customize the header and footer by ticking the information you want to include from the Headers and footers.
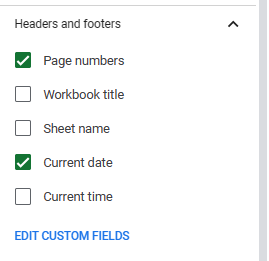
- Click EDIT CUSTOM FIELDS to change the page headers and footer directly enabling custom text or fields to be added to your headers and footers. As with Excel, you can customize the left, center, and right sections of the header and footer.
![]()
- Once you have customized the options in Print Settings, click Next to send the spreadsheet to print. The sheet appears in Print Preview.
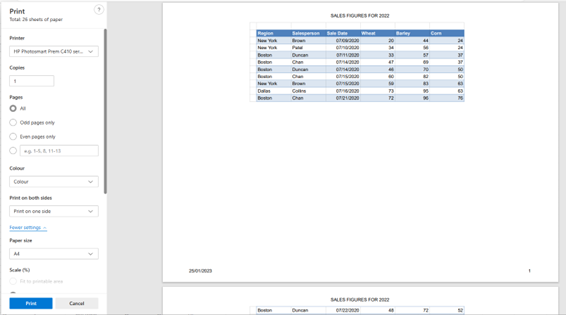
- Select the printer, the number of copies, the pages to print, whether to print in color or black and white (depending on your printer), and the paper size.
- Click Print to print the worksheet.
