What is the Page Setup Function in Excel & Google Sheets?
Written by
Reviewed by
This tutorial explores the Page Setup options in Excel and Google Sheets.
Page Setup allows you to set the appearance of printed worksheets. This includes margins, page orientation, paper size, print areas, breaks, backgrounds, and print titles. It also allows you to customize headers and footers and scale the document to size.
In this Article
Access Page Setup
- In the Ribbon, go to Page Layout > Page Setup.
- Then choose from the options that are available in the group by means of their individual drop downs.
Or click the selector in the bottom-right corner of the group. This opens the Page Setup dialog box (pictured above).
Adjust Margins
- In the Ribbon, go to Page Layout > Page Setup > Margins. Then choose from the drop down.
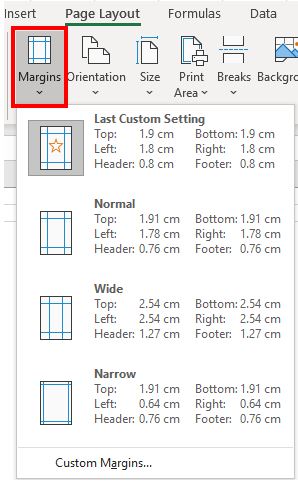
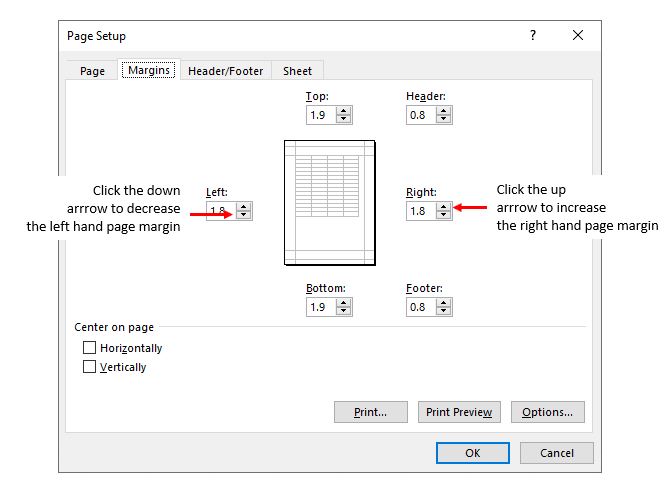
If you click Custom Margins…, the Page Setup dialog box opens to the Margins tab.
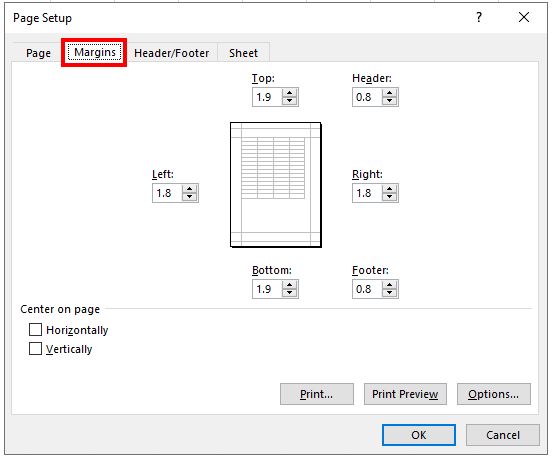
With this window open, you can manually adjust the Top, Left, Bottom, and Right margins. You can also adjust the margins for the Header and the Footer.
- To adjust any of these margins, use the arrows to the right of each measurement. You can adjust the margins to be greater or smaller than the current value shown.
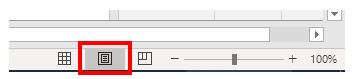
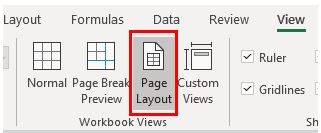
- To view the worksheet’s margins, switch to Page Layout view by clicking the Page Layout view button in the bottom-right corner of Excel.
Alternatively, in the Ribbon, go to View > Workbook Views > Page Layout.
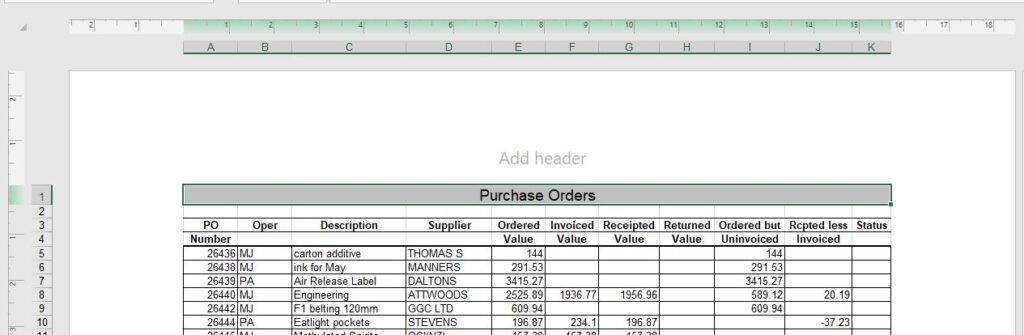
Page Layout view displays the worksheet as it would be shown when printed. A ruler is shown at the top of the screen above the columns and another ruler is shown down the left side of the screen to the left of the row numbers.
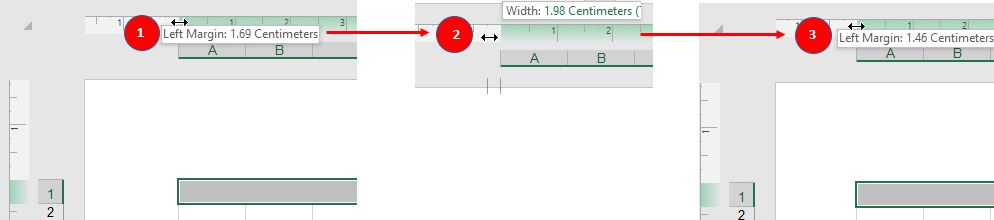
Rulers to Adjust Margins
Using rulers is another way to adjust margins. Click and drag in either direction along the ruler.
- Using the mouse, rest the cursor on the margin to be adjusted.
- Then, drag the double-arrow to the left to decrease the size of the left margin.
- Release the mouse button to see the effect of the change.
- To return to Normal view in the worksheet, click the normal view button in the bottom-right corner of Excel.

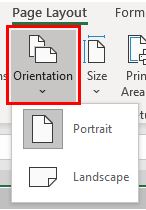
Adjust Page Orientation
In the Ribbon, go to Page Layout > Page Setup > Orientation, and then choose either Portrait or Landscape from the drop down.
OR
- Alternatively, in the Ribbon, go to Page Layout > Page Setup and click the dialog box selector in the bottom-right corner of the group to show the Page Setup dialog box.
- The Page Setup dialog box opens to the Page tab. For Orientation, choose either Portrait or Landscape, and then click OK.
Adjust Paper Size
- In the Ribbon, go to Page Layout > Page Setup > Size, and then choose the size you need from the drop down.
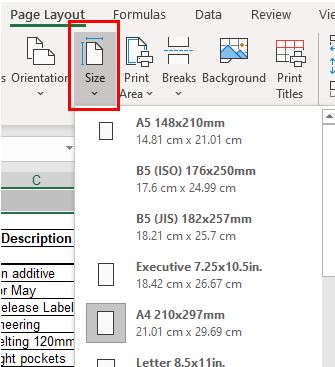
Alternatively, click More Paper Sizes at the bottom of the list, or open the Page Setup dialog box (to the Page tab).
- From the Paper size drop down, choose the paper size, and then click OK.

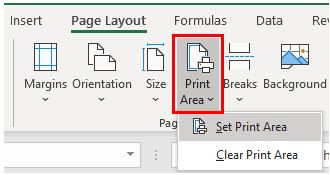
Set Print Area
A print area defines what area of the worksheet is intended for printing. This means only this area prints each time you print the worksheet.
- First, select the range for the print area.
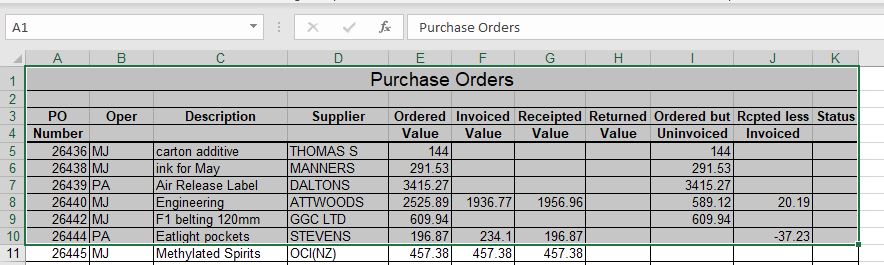
- Then, in the Ribbon, go to Page Layout > Print Area > Set Print Area.
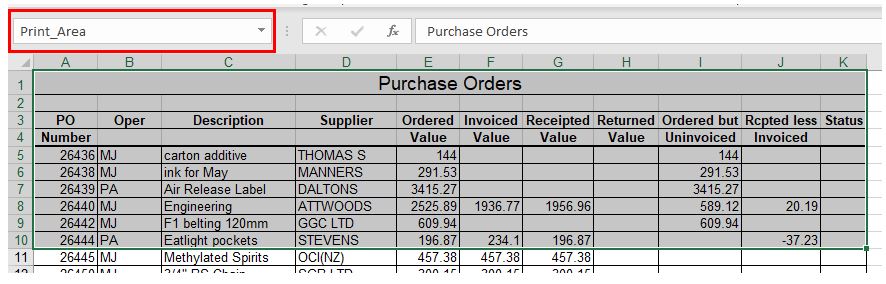
This creates a range name called Print_Area. Anything outside the print area doesn’t print.
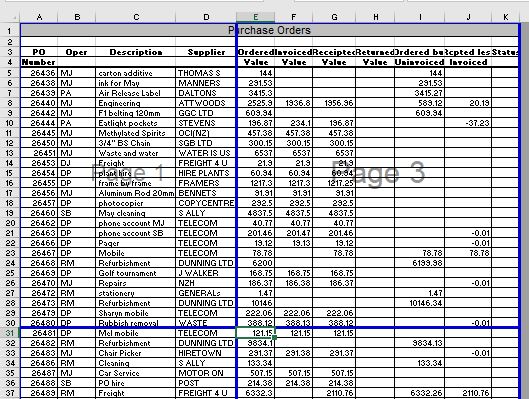
- To view the print area for the worksheet, you can switch to Page Break Preview by clicking the page break preview button in the bottom-right corner of Excel
The print area is displayed inside a blue border. Any rows and columns outside this border won’t print or show up in Print Preview.
- To return to Normal view in the worksheet, click the normal view button in the bottom-right corner of Excel. (See “Rulers to Adjust Margins,” Step 4 above.)
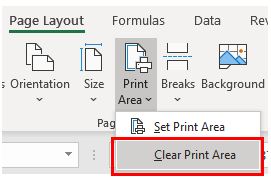
Remove Print Area
To remove the Print Area, in the Ribbon, go to Page Layout > Print Area > Clear Print Area.
The previously excluded rows and columns are now added back into the print and preview ranges.
Insert Page Breaks
Page breaks are inserted into the worksheet automatically if the data in that worksheet takes up more rows and columns than fit onto the paper size you’re using. However, you can manually insert page breaks into worksheets to break at specific locations.
Both horizontal and vertical page breaks can be inserted into the worksheet.
Rules to remember:
- A page break is inserted between the selected column and the column to the left.
- A page break is inserted between the selected row and the row above.
Horizontal Page Breaks
- In Column A, select the row you want as the top row of the next page.
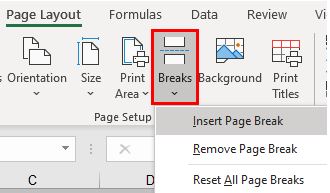
- In the Ribbon, go to Page Layout > Page Setup > Breaks > Insert Page Break.
- Switch to Page Break Preview by clicking on the Page Break Preview button in the bottom-right corner of your screen, or in the Ribbon, go to View > Page Break Preview.

This shows the page break across the screen as a blue line.
Vertical Page Breaks
- Select the column that you want as the left-most column of the next page.
- Ensure the pointer is in Row 1 of the column you’re inserting the page break in.
- In the Ribbon, go to Page Layout > Page Setup > Breaks > Insert Page Break.
Add Horizontal and Vertical Page Breaks at Once
- To insert both vertical and horizontal page breaks at once, select the cell you want as the top-left cell of the new page.
- In the Ribbon, go to Page Layout > Page Setup > Breaks > Insert Page Break.
Excel inserts both page breaks at the selected cell.
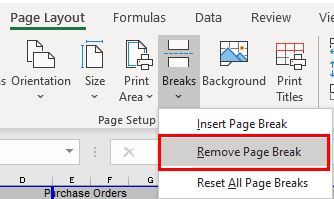
Remove Page Break
- To remove a single page break, switch the view to Page Break Preview by clicking on the page break preview button in the bottom-right corner of the screen, or in the Ribbon, go to View > Page Break Preview. This shows any previously created page breaks.
- Click in any cell directly under or to the right of the page break line on the screen.
- In the Ribbon, go to Page Layout > Page Setup > Breaks > Remove Page Break.
(To remove all the page breaks in the worksheet, click Reset All Page Breaks.)
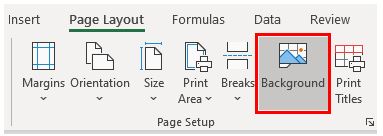
Insert a Background
The Background button allows you to add a background image to the sheet.
- In the Ribbon, go to Page Layout > Page Setup > Background.
You can choose a picture from a file on your PC, search Bing for an image on the Internet, or choose a picture from OneDrive.
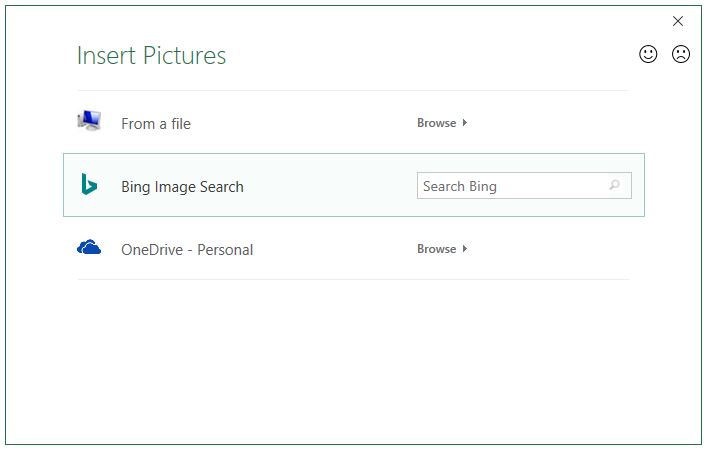
- For this example, click Bing Image Search.
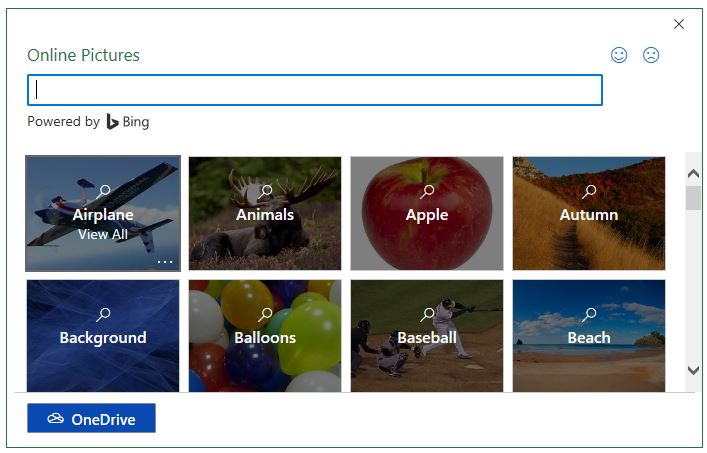
- Either type in a search term for the picture or click one of the available categories.
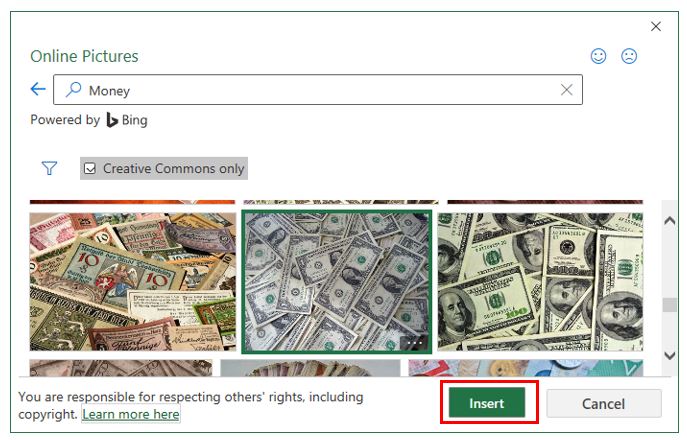
- Choosethe picture you want and click Insert.

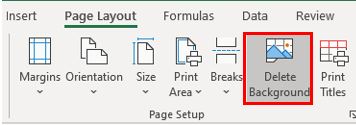
- To remove the background image, in the Ribbon, go to Page Layout > Page Setup > Delete Background.
Print Titles
Print Titles are used when there are rows or columns that you want to print at the top or left side of every page in a worksheet. They are very helpful when you have a large worksheet that prints over several pages, and you want to be able to see the top- or left-most headings on each page.
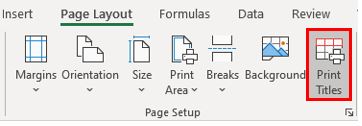
- In the Ribbon, go to Page Layout > Page Setup > Print Titles.
The Page Setup dialog box opens to the Sheet tab.
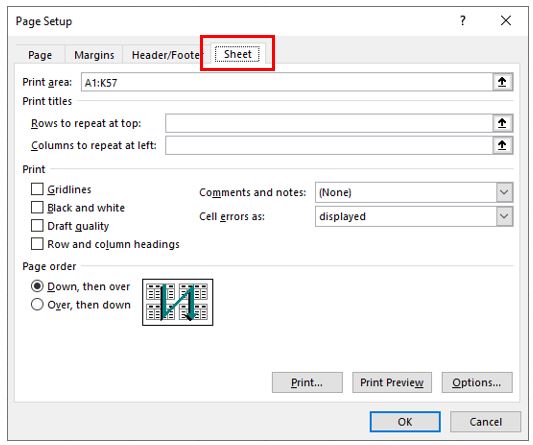
- You can have both rows and columns set as print titles. In the Print titles section, click in the Rows to repeat at top box and then click the up arrow to the right.
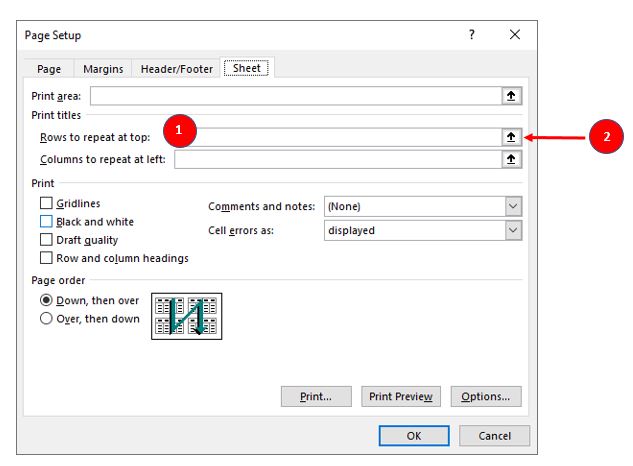
- Select the rows that need to be repeated on each page of the worksheet and then click the little down arrow to return to the Page Setup dialog box.

- Click OK. Excel now repeats the selected lines at the top of every printed page.
- To repeat columns, follow the same steps as above for setting rows but place your insertion point in the Columns to repeat at left box. Then in the worksheet click the column(s) that you want to repeat at the left of every page. You can select more than one column; however, columns must be adjacent.
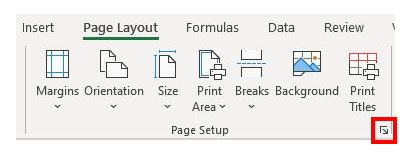
The Page Setup Dialog Box: Additional Functions
There are more functions in each tab of the Page Setup dialog box that do not appear in the Page Setup group in the Ribbon.
In the Ribbon, go to Page Layout > Page Setup and then click the selector in the bottom-right corner of the group to show the Page Setup dialog box.
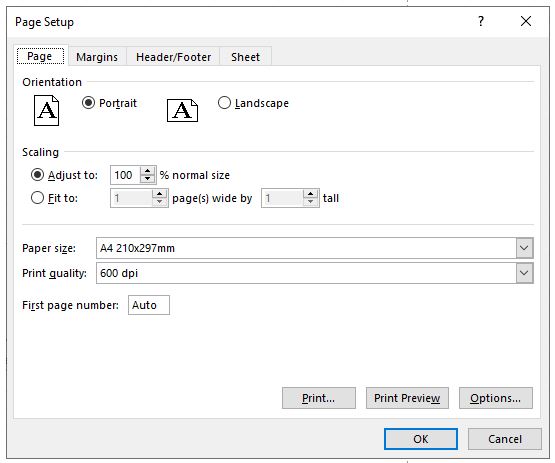
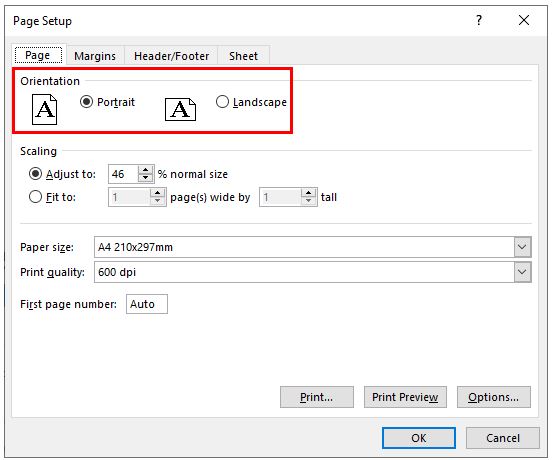
Page Setup: Page
Additional functions in the Page tab include Scaling, Print quality, and First page number.
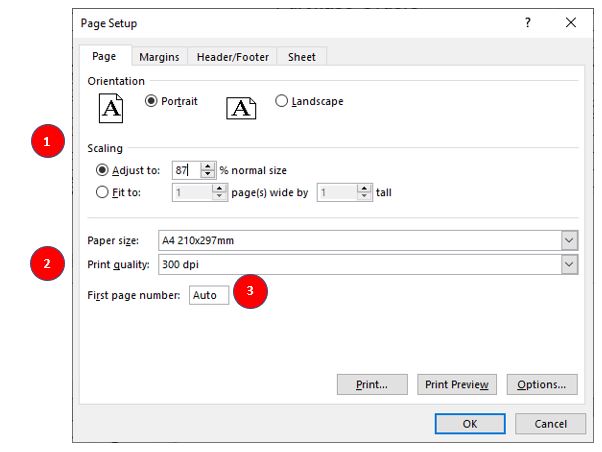
- Scaling sets the scale of the print size to either force the worksheet to print on a specified number of pages, or to increase/decrease the size of print as needed.
- Print quality lets you choose a suitable print quality, i.e., DPI count/resolution.
- First page number lets you set a starting page number, rather than the default setting of starting on page 1.
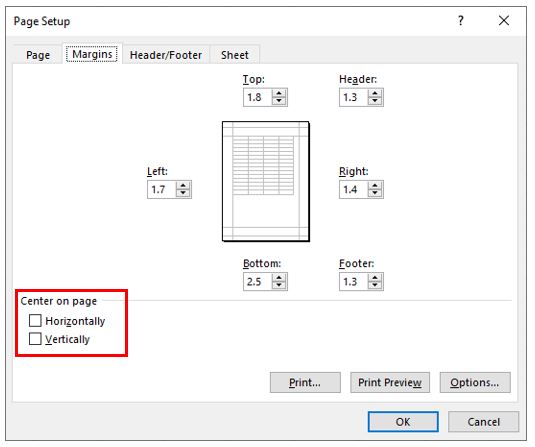
Page Setup: Margins
The Margins tab lets you center a worksheet in the middle of the printed page, both vertically and horizontally.
The Header/Footer tab is the only tab where none of the functions displayed appear in the Page Setup group of the Ribbon. Instead, Header & Footer appears in the Ribbon on the Insert tab.
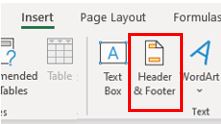
- In the Ribbon, go to Page Layout > Page Setup. This opens the Page Setup dialog box. Click the Header/Footer tab.
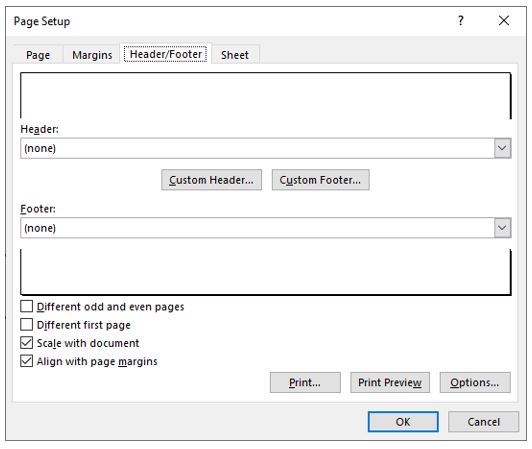
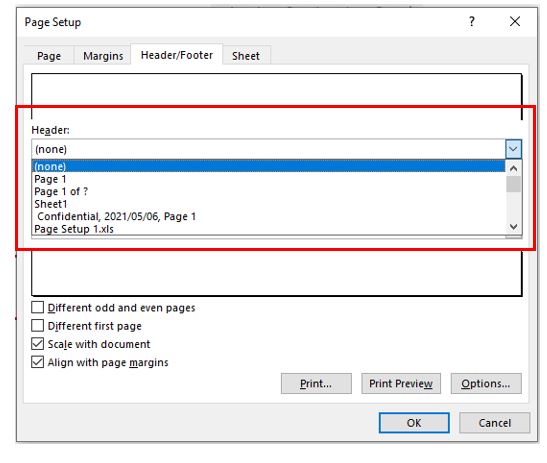
- To insert a default header into the worksheet, click the Header drop down to choose from a preexisting headers list.
- Repeat the process to insert a footer into the worksheet by choosing from the preexisting footers list in the Footer drop down.
Custom
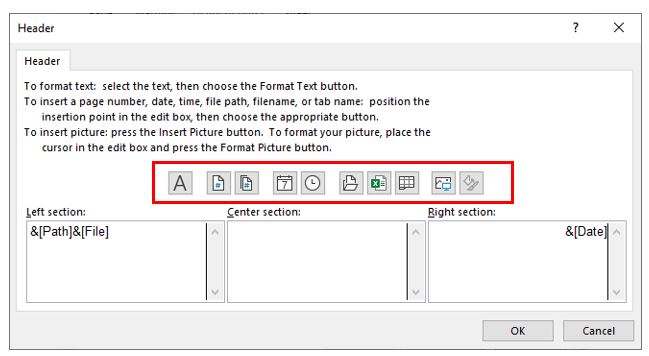
- For a custom header or footer, click Custom Header… or Custom Footer…
- You can insert information in the left, center, and right sections of the header and footer. Custom Codes can be used to insert the file path and name, date, and time, and page numbers.
- In addition, you can use the headers and footers tab to set odd and even pages, set a different first page, scale the font size with the document, or align the headers and footers with the page margins.
Page Setup: Sheet
Other functions in the Sheet tab include Print Options and Page Order.
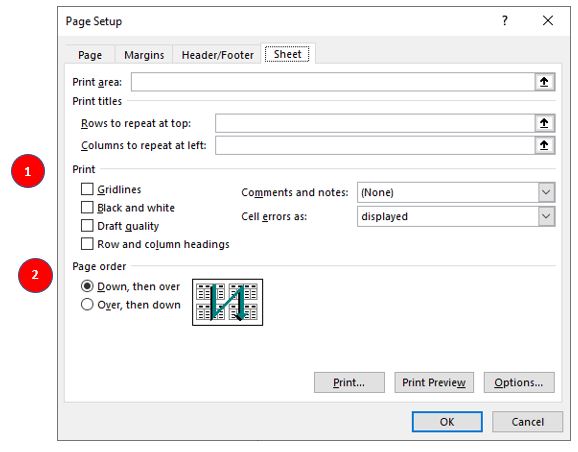
Print options include the ability to print the gridlines, print in black and white, print draft quality, print the row and column headings, if any. Any comments and notes that may be in the worksheet can be set not to print (None), to be printed at the end of the workbook, or to be printed as displayed in the workbook. Cell errors can be printed as displayed, as a blank, as “–“, or as N/A.
The page order can be adjusted to be Down, then over or Over, then down. The default is Down, then over.
From the Page Setup dialog box, Print and Print Preview can be accessed as well as Printer Options.
Page Setup in Google Sheets
Page Setup in Google Sheets is contained within the print functions.
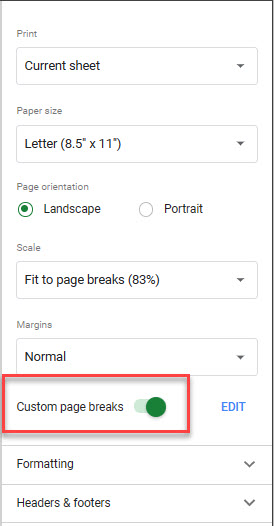
In the File menu, go to Print to show the page setup options available.
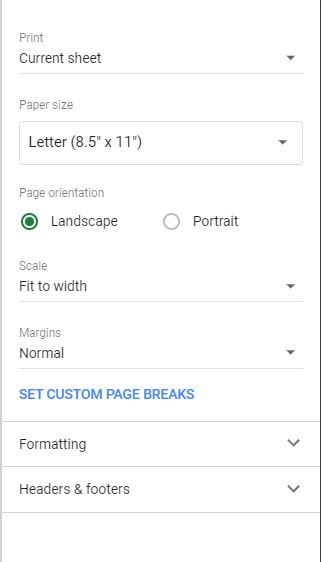
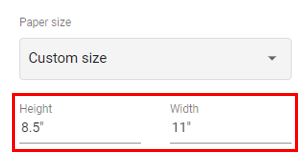
Paper Size
To change the paper size, click the drop down and choose a size, or choose Custom size and type in the paper size you need.
Page Orientation
Choose Landscape or Portrait to change the orientation.
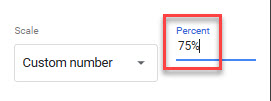
Scale
To adjust the scaling, choose an option from the list.
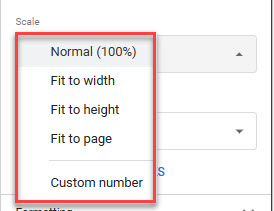
If you choose Custom number, you can type in the percentage scaling.
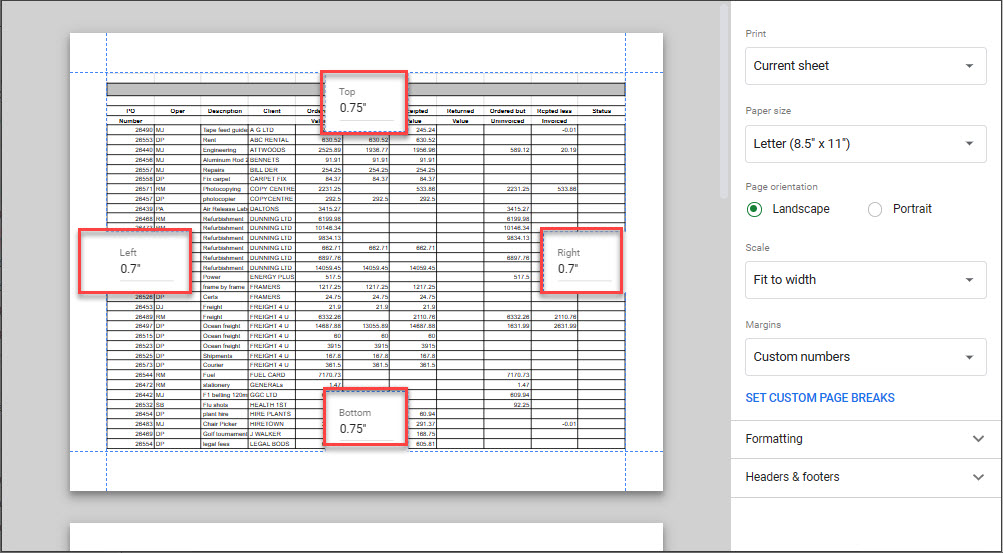
Margins
You can choose Normal, Narrow, Wide, or Custom numbers.
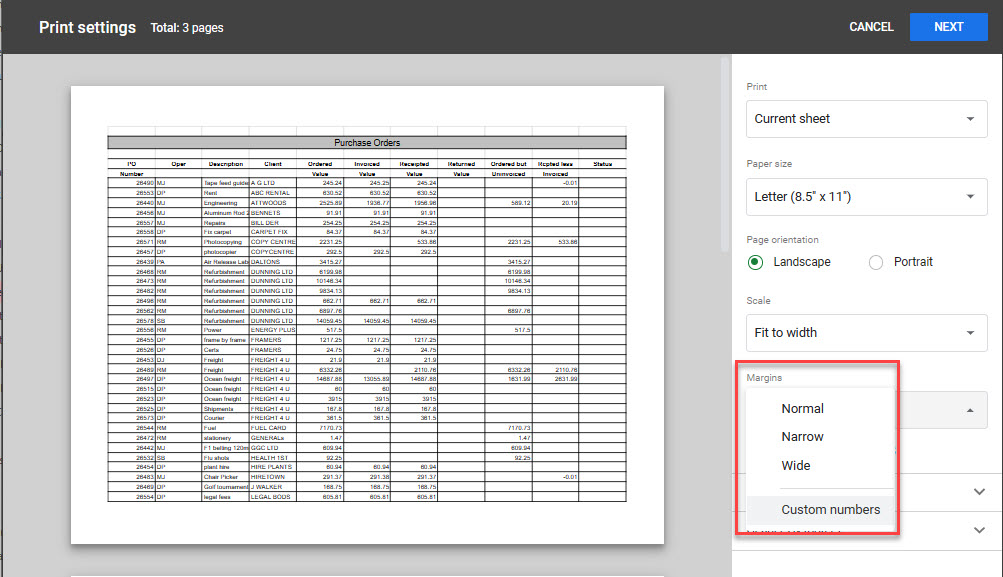
If you choose Custom numbers, you can type in the numbers for your top, bottom, left, and right margins.
Custom Page Breaks
- To insert custom page breaks, click the SET CUSTOM PAGE BREAKS.
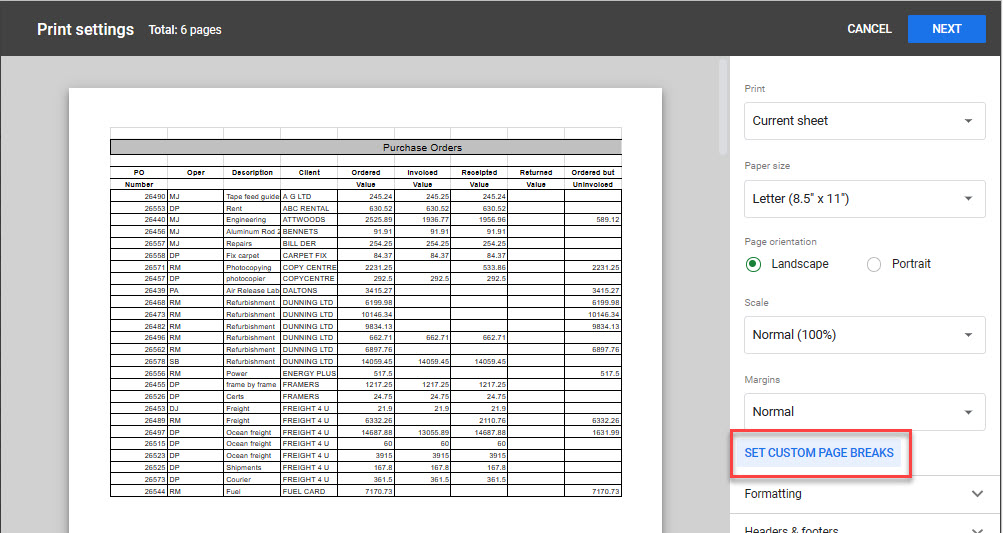
- To insert a row page break, drag the dotted blue line going across your sheet up or down your sheet.
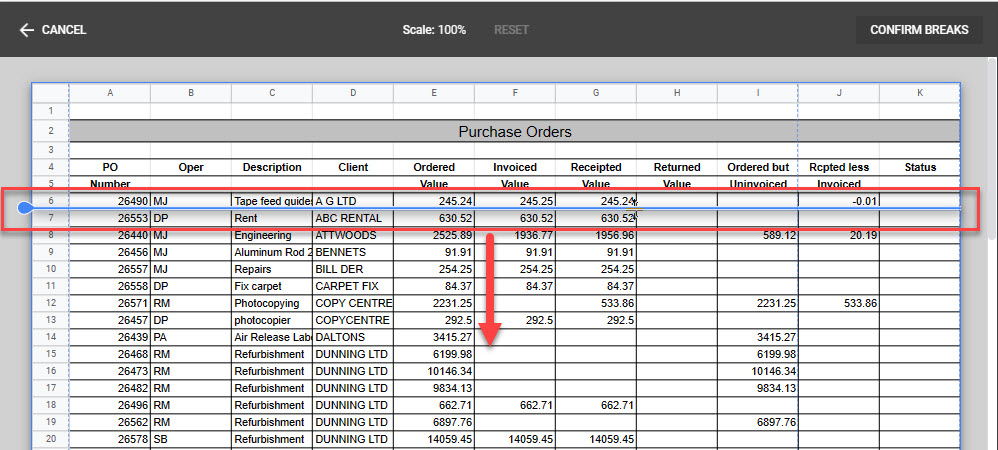
- To insert a column page break, drag the dotted blue line going down the page across to the left or right.

- Click CONFIRM BREAKS to return to Print Preview.

- The Custom page breaks indicator is now switched on.
- You can edit the custom breaks by clicking EDIT.
Alternatively, you can remove all custom breaks by clicking the Custom page breaks toggle button to off.
Formatting
Click Formatting to show the formatting options available.
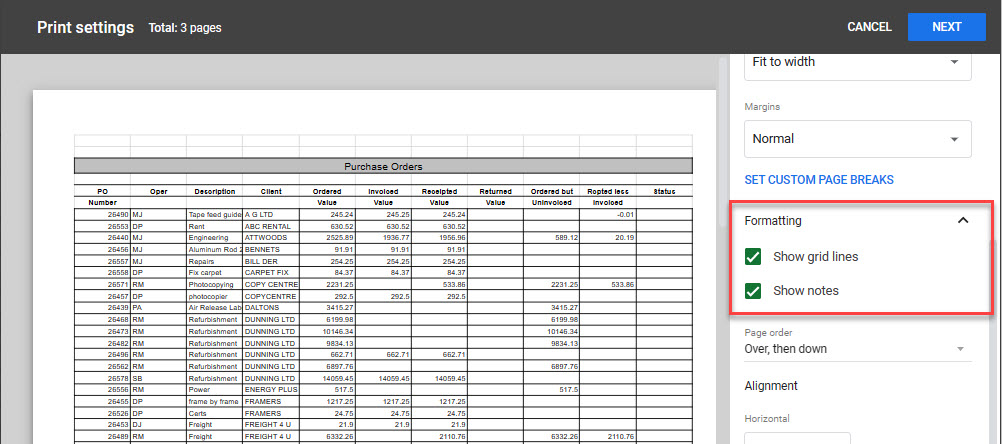
- Show Gridlines allows you to show or hide gridlines when the sheet is printed.
- Show Notes enables the notes to be printed as they appear in the Google Sheet, or to be switched off instead.
- Page order (Over, then down or Down, then over) allows you to dictate which page comes second (the one to the right or the one below the current page).
- Alignment allows you to change the horizontal and vertical alignment of the content in the sheet.
- Click Headers & footers to show the header and footer options available.
Checking the options from the list (e.g., Page numbers, Workbook title, Sheet name, Current date, and Current time) automatically places the information into the header and footer of the sheets.
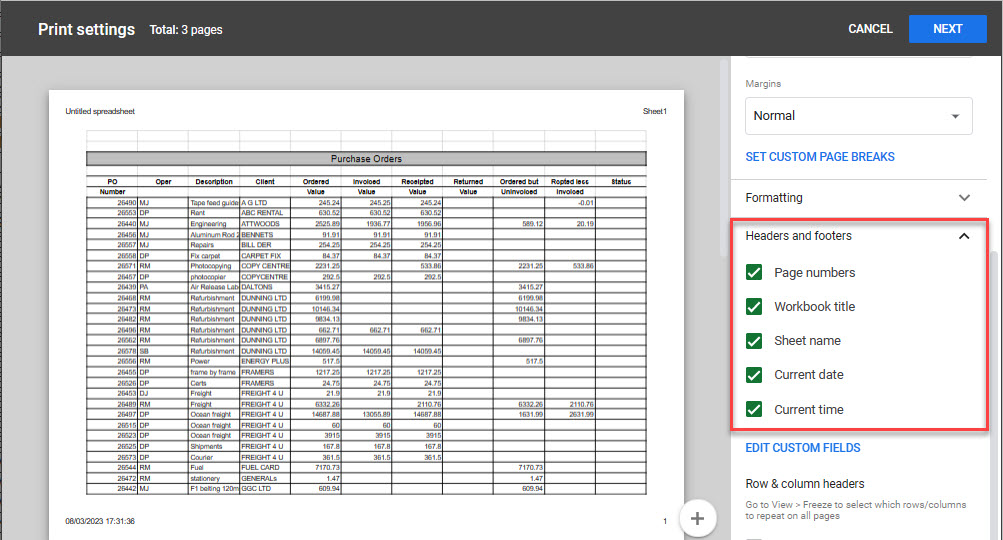
- To have more control over where the information is placed, or to type in your own header and/or footer, click EDIT CUSTOM FIELDS. This enables you to type in the header and footer areas of your Google sheet.
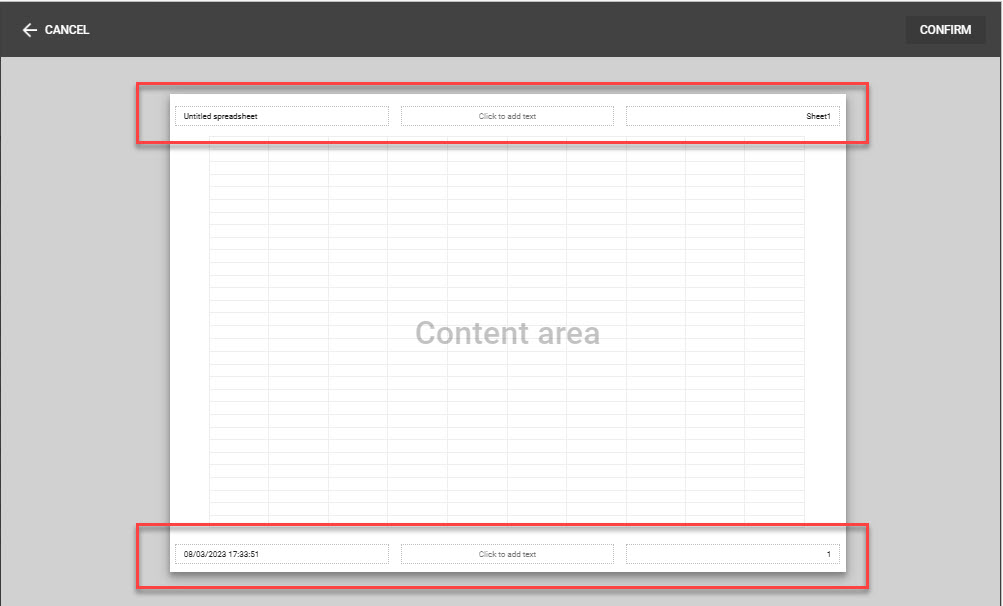
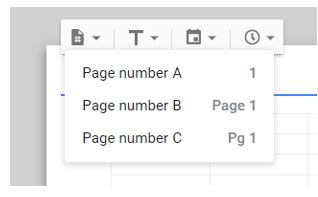
- To insert page numbers, click in one of the available areas and then, using the first button on the toolbar, choose a page number format.
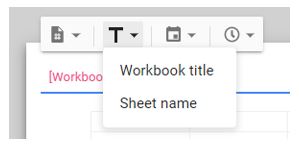
- To insert the workbook name or sheet name, click the second button on the toolbar and choose the field you want.
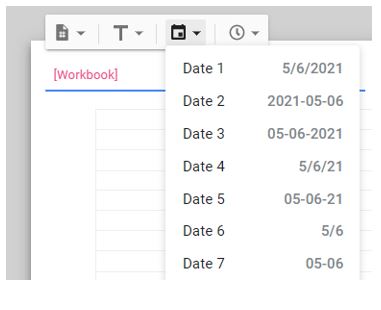
- To insert the date, click the third button on the toolbar and choose the date format from the drop down.
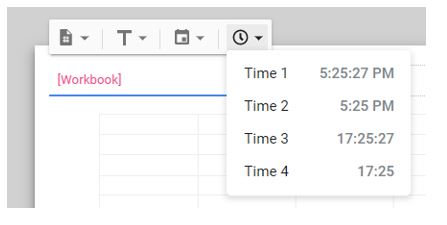
- Finally, to insert the time, click the fourth button and choose the time format from the drop down.
- Click CONFIRM in the top-right corner of the sheet.

- Click NEXT to send the Google sheet to the printer.

Tip: If you click CANCEL as this stage, you lose all sheet formatting. However, if you click NEXT, and then in the Print menu click CANCEL, the sheet formatting remains!
